Thursday, November 25, 2010

Thanksgiving, October's Pasta Night and a Troubled Spaetzle Attempt

As Britt sings when I'm lucky, Happy, Happy, Happy Turkey Day! If you celebrate Thanksgiving, I hope you've all found many things to be thankful for and that you are enjoying time with your family,  biological or chosen. My family is feasting on Friday and Sunday, so I am not indulging yet but there's no reason not to be thankful in advance of the trimmings. I am grateful to my family and friends for their ongoing love and support, the experiences I have had this year including visiting Lizzie in Minneapolis and checking out the Betty Crocker Test Kitchens, touring Glacier National Park and attending fun weddings among others. 

One of my favorite things in NYC has been thematic cooking events. First there were Dana's where my urge to share my cooking trumped my nervousness about being somewhere surrounded (mostly) by strangers. Then there has been the new version organized by Meg. Our most recent was Pasta Night i.e. making use of her Kitchen-Aid Mixer's Pasta Roller. Everyone contributed something - Leslie's awesome meat ragu was the star in my opinion - and we learned that there is a limit to how many times you can run pasta through the roller without losing its tenderness while chatting, eating and drinking. Perfection.

My contribution was freshly grated Parmesan and Fettuccine Alfredo sauce, my favorite childhood food other than ice cream. I returned to All Recipe's Fettuccine Alfredo V something I made in college with these notes "a little buttery, use less margarine (what I substituted), rich enough to give a little stomachache, it got rave reviews from my roommates and sisters, possibly could use a bit more garlic and have to stir upon reheat then it is a bit grainy but still flavorful. That also mixes the butter back in" for the occasion. I'm pleased to report it no longer gives me a stomachache, even though I traded up to butter. It is just delicious. If you like Fettuccine Alfredo when dining out, trust me, the linked version beats it.

The following Monday I used the leftover Fettuccine Alfredo sauce, blanched zucchini, basil chiffonade and spaetzle with lemon zest to create something similar to my memory of a dish I ate at B-Bar in May. The flavor was good, but I learned the hard way that a potato ricer does not work to make spaetzle. Mine did not cook as evenly as April's and looked a bit like brains, if their tissue were white.

Vanessa and Meg made the pasta from scratch.


We all took turns running the pasta through the pasta roller. 

Erin made lovely bow ties.

The rest of the dough turned into fettuccine.

Bow Ties with Leslie's killer ragu. This was only the start of what I ate.

My attempt at spaetzle, though not lovely, was delicious.

Tuesday, November 23, 2010

Avocado-Cilantro Soufflé and Pepper Jicama Salad with Lime-Cumin Vinaigrette

Dave and Linda from Monkeyshines in the Kitchen chose Soufflés as our November 2010 Daring Cooks’ Challenge! Dave and Linda provided two of their own delicious recipes plus a sinfully decadent chocolate soufflé recipe adapted from Gordon Ramsay’s recipe found at the BBC Good Food website. You can find their recipes and tips here. You can find Audax's always amazing additional tips and results here.

This month I was not only late but I also was very daring. I reviewed the provided recipes and those in my Fine Cooking I binder, then I created an Avocado-Cilantro Soufflé. I'll walk you through the steps I took but I can't say I would recommend that you try it since it's flavor improved as it cooled and soufflés are meant to be served HOT! If you do try it, add salt to the avocado mixture and keep an eye on it to ensure it doesn't overcook. Mine rose beautifully only to collapse after I overcooked it...at least the internal texture was right nevermind the rest of it.

I served the Avocado-Cilantro Soufflé with Sweet Potato Fries, a simple Pepper Jicama Salad with Lime-Cumin Vinaigrette (that you should make) and some Foreman'ed Pork Chops (courtesy of an assist from my Mom when I ran out of steam) topped with Caramelized Onions. Being home for Thanksgiving and having Mom's Kitchen-Aid mixer and dishwasher made this whole process so much easier!

Thanks to her, Dad and Jarrett for being so patient while I put our meal together and for bearing with the experimental soufflé.

Avocado-Cilantro Soufflé
(enough for a 1.5 quart dish; serves 4 people)

1 Tbsp. Butter
Crushed Doritos


1 Haas Avocado
1/4 cup Cilantro, chopped
2 Tbsp. Coconut Milk (Regular Milk or Cream would be fine)
1 Tbsp. Butter
1/8 cup cheddar cheese

4 egg yolks, at room temperature
8 egg whites, at room temperature

1. Melt 1 tablespoon of butter in oven-proof dish with high sides. Coat the interior of the dish with the butter, then coat it with the crushed Doritos.
2. Preheat the oven to 350 degrees.
3. Halve the avocado, remove its pit and scoop the flesh into food processor. Rinse and dry the cilantro, pluck off the leaves and chop enough to add 1/4 cup cilantro to avocado. Add 2 tablespoons of coconut milk to the food processor to facilitate pureeing. Puree the mixture until smooth.
4. Melt the other tablespoon of butter into a pan on the stove. Transfer avocado-cilantro mixture to the pan, add the grated cheddar and warm the mixture incorporating the cheddar. Remove from heat and cool slightly.
5. Temper the 4 egg yolks with a little of the avocado mixture, then incorporate them into the avocado-cilantro mixture. Transfer to a medium bowl.
6. Beat the egg whites to soft peak stage and fold them into the avocado-cilantro mixture. Be careful not to overmix and deflate the egg whites.
7. Transfer the mixture into oven-proof dish, wipe the edges clean and smooth the top. Bake until puffy, serve immediately. 40 minutes was way too long of a baking time; maybe try 22 minutes as that is when my souffle was elevated and starting to turn golden.

Pepper Jicama Salad with Lime-Cumin Vinaigrette
(an approximate recipe to serve 4-6 people)

5 Ounces of Baby Spinach
1.5 Red, Orange and/or Yellow Peppers
1 Medium Jicama
1 Lime, juice only
1.5 Tbsp. Canola Oil
1 Tsp. Cumin
.5 Tbsp. Agave Nectar
Salt and Pepper

1. Retrieve a large bowl. Place the spinach in the bowl.
2. Wash the peppers and cut them into small dice. Place the the diced pepper in the bowl with the spinach.
3. Peel the jicama using your knife. Cut it into small cubes. Add these cubes to the bowl.
4. Juice the lime into a jar with a lid. Add the canola oil, cumin, agave nectar and salt and pepper to taste. Shake vigorously. It should still be slightly tart in my opinion for a bright contrast to the jicama and pepper's sweetness.
5. Pour over the salad and serve.


Thursday, November 18, 2010

Pumpkin Spice Chickpeas

Clearly I am on a roll... I have been eating pumpkin spice again thanks to Sarah of Peas and Thank You's Pumpkin Spice Chick Peas, which I've made twice now. They are easy and addictive with their crisp exterior and slightly sweet flavor. For my second batch I added a bit of cayenne pepper and halved the maple syrup to up the savory factor. We'll see what happens next time.

To keep things simple, this time I also just mixed my salad (spinach, carrot shreds and a little bit of cheddar cheese) in the bowl I mixed the chickpeas in prior to roasting them. I only needed a touch more apple cider vinegar, salt and pepper to have it ready for the finished chickpeas. No waste and no extra bowl...also not vegan...but we'll tackle that some other time. The sweet and savory combo can't be beat.

Mama Pea's Pumpkin Spice Chickpeas
1 can of chickpeas, rinsed, drained and patted dry
2 T. maple syrup
1 t. canola oil (or oil of your choice)
1 t. apple cider vinegar
1/8 t. salt
1/4 t. nutmeg
1/4 t. ginger
3/4 t. cinnamon

1. Preheat the oven to 350 degrees Fahrenheit. Place all ingredients in a mixing bowl and stir them until evenly coated.
2. Line a baking sheet with aluminum foil (for easy clean-up) and spray it with olive, canola or another oil.
3. Place the baking sheet in the oven for 25 minutes. Be sure to wiggle them periodically to encourage even crispness.


Tuesday, November 16, 2010

Pumpkin Cinnamon Swirl Bread

One of my favorite treats growing up in Richmond, Virginia was fresh bread from Montana Gold Bread Company in Carytown. Going to get new pointe shoes at Ellman's inevitably ended with a thick, sample slice and a few loaves coming home. When I saw Cassie from How To Eat a Cupcake and Flour Child Bakery post this Cinnamon Swirl Bread I was brought back to their Cinnamon Swirl Bread and bookmarked the recipe confident that I could bring a version of Montana Gold's bread to my Brooklyn kitchen.

My only changes to the recipe were spreading a bit of canned pumpkin between layers in lieu of raisins  (because what isn't pumpkin good in?), rolling it up without the topping and having to unroll it (oops) and letting it rise overnight in the fridge, which didn't hold it back in the least as this bread was a prodigious riser. I'm not kidding. It's strength buckled my silicon loaf pan.

The resulting loaf was an excellent likeness to the one in my memory -- light and fluffy in texture and slightly sweet. It was great on its own fresh or toasted with a bit of butter later in the week. To get a feel for it imagine the texture and size of Texas Toast only replace the garlic and butter with a sweet swirl. My only change next time will be having more space to roll out the dough, so there will be more of a swirl in my end result! You've got to try it.

Other excitement: I have two new readers! Thanks for signing on y'all. I also ran my first 8k this past weekend; thanks to a friend's pace setting skill there were no stops or walking breaks and we finished in 58:20. I didn't think a 5k outside was possible much less an 8k. :)

Pumpkin Cinnamon Swirl Bread
From Joy of Cooking via How To Eat A Cupcake
Yield: 1 loaf

1 package (2 1/4 teaspoons) Active Dry Yeast
3 tablespoons Warm Water (105 to 115 degrees Fahrenheit)
1 cup Milk (full fat or nonfat both are fine, heat to  low-fat milk, warmed 105 to 115 degrees Fahrenheit)
6 tablespoons Melted Unsalted Butter (keep one tablespoon for finishing)
3 tablespoons Sugar
1 large Egg
1 teaspoon Salt
3 1/2 to 4 cups All-Purpose Flour

Filling:
1/2 cup Pumpkin
2 tablespoons Sugar
2 teaspoons Cinnamon

Finishing
1 Egg
Salt
1. Combine yeast and water in a large bowl or bowl of mixer and stir. Let stand for five minutes until yeast dissolves. Meanwhile, oil a large bowl.
2. Add the remaining ingredients, except for the flour and the aforementioned teaspoon of butter, and mix for 1 minute on low speed. Add the 3 1/2 cups of flour a 1/2 cup at a time, until dough pulls away from the sides of the bowl yet sticks to its bottom. If needed, continue adding a tablespoon of flour at a time until you reach the right consistency.
3. If using a mixer with a dough attachment, switch to it and knead for about 10 minutes on low to medium speed until the dough is smooth and elastic. If kneading by hand, sprinkle the counter with flour and knead the dough until smooth and elastic.
4. Place the dough in the prepared bowl and turn it over once to coat. Loosely cover with plastic wrap and let rise for 1 1/2 to 2 hours or until doubled in volume.
5. Open the can of pumpkin and scoop out 1/2 cup in a small bowl. Mix the cinnamon and sugar for the filling.
6. Grease an 8 1/2” x 4 1/2” loaf pan. Melt the reserved butter. Punch dough down. Roll the dough into an 8” x 18” rectangle about 1/2” thick. Brush the surface of the dough with the 1 teaspoon of the melted butter. Sprinkle all but 2 teaspoons of the cinnamon sugar over the dough and spread the pumpkin as evenly as you can over the surface. Starting from one 8” side, roll up the dough and pinch the seam and ends closed. Place seam side down in the pan. Cover loosely with oiled plastic wrap and let rise until doubled in volume, 1 to 1 1/2 hours.
7. Preheat the oven to 375 degrees Fahrenheit. Whisk egg and salt together and gently brush over the top of the loaf. Sprinkle the top of the dough with the remaining cinnamon sugar. Bake until crust is deep golden brown and the bottom of the sounds hollow when tapped, 40 to 45 minutes. Remove loaf from the pan onto a cooling rack. While the bread is still hot, brush the top with the remaining melted butter, then let it cool.
8. Once cool, slice and enjoy.


Thursday, November 11, 2010

Root Vegetable Risotto

As I threw this together I was calling it “Going to Richmond Risotto” in my head since I just was cleaning out the fridge for my trip home tonight (!) when I came up with the ingredients. I can't wait to be home, to have time to think and to catch up with my often too far away family.

The risotto ended up looking so festive that I decided to share. Plus it tastes delicious. It is warm, filling and comforting -- perfect for Fall and perhaps Thanksgiving? I bet you could throw Turkey Day leftovers into a risotto for a tasty result too. Hmm.  Anyway, the parmesan makes the risotto tangy and rich while the root vegetables add sweetness and the beet greens spice things up a touch.

This is the first time I’ve enjoyed beet greens too, which is a serious accomplishment. I didn’t have to feel guilty for discarding them. Finally. Here’s hoping to many more…maybe one day even without cheese.

Root Vegetable Risotto
Yields approximately 5 cups

1.5 Tbsp Browned Butter (or Regular)
3 Leeks
Salt
1 1/2 cups Arborio Rice
1/4 cup Dry White Wine
4-5 cups Chicken Broth
1/2 cup Parmesan Cheese
1/4 cup Nonfat Greek Yogurt

1-2 Tbsp Olive Oil
1 Large Sweet Potato
2 Small Red Beets
1 Large Golden Beet
1-2 Bunches of Beet Greens
Salt and Pepper

Directions (as usual adapted slightly from Sally Schneider’s A New Way To Cook)
1. Heat 4-5 cups of chicken broth in the microwave until warm. In the meantime, cut the leeks in half, trim down to the white portions and slice into 1/8” pieces.
2. In a large saucepan, melt the butter over low heat. Add the leeks and a little salt. Sauté for 5 minutes until tender. Add the rice and cook, stirring constantly, until the grains look chalky with a white dot in the center of each, about 5 minutes. Turn the oven on to 400 degrees. Line a baking sheet with foil.
3. Add the wine and cook, stirring, until it has been absorbed by the rice. Stir in 1/2 cup of the broth. Cook at a very low boil, stirring frequently, until almost all the liquid is absorbed. Continue adding the broth in this fashion, 1/2 cup at a time, cooking and stirring until the grains of rice are tender yet still firm in the center and the risotto is creamy but not soupy.
4. While the risotto cooks…. Put olive oil into a large bowl. Trim beet greens, rinse and dry. Set aside. Peel sweet potato and beets. Slice into 1/4” thick slices, and then cut into 1/4” slices. Toss with olive oil in the bowl.
5. Lay the beets and sweet potatoes out on the tray. Sprinkle with salt and pepper. Place the sweet potatoes, red beets and golden beets in the oven for approximately 25 minutes.
6. While they roast and the vegetables roast, slice the beet greens into ribbons.
7. Add the beet greens to the risotto with the last 1/2 cup of broth and stir.
8. Remove the root vegetables from the oven and cool. Remove the risotto from the heat, stir in the Greek yogurt and Parmesan.
9. Add the root vegetables in and stir the mixture together. Sprinkle with salt and pepper.

Tuesday, November 9, 2010

Whole Wheat Pita Pizza with Roasted Apples, Sweet Potato and Caramelized Onion

Though I don't feel compelled to become vegan it intrigues me, so when The New York Times referenced vegan Thanksgiving dishes I clicked over to Chef Chloe's Web site to check them out. What really caught my eye once there was her Flatbread with Roasted Apples, Butternut Squash and Caramelized Onion. I knew I had to make it immediately.

I wasn't disappointed by this decision in the least; it is seasonal and satisfying with the crunchy crust, garlic's bite and sweetness from the caramelized onions and roasted vegetables. This flatbread can be a meal on its own but I presented it as a first course and suspect it would also make a great appetizer.

I didn't follow Chef Chloe's recipe exactly as I was feeling lazy but I didn't change it substantively either. I substituted whole wheat pitas for pizza dough and a diced large sweet potato for butternut squash as they are a bit easier to handle. To make up for using pre-baked bread, I roasted my vegetables on their own while the onions caramelized, then topped the pita with everything and heated it for approximately 5 minutes.

Having prepared the components separately enabled me to enjoy fresh flatbread several days in a row, which is a plus! I managed to eek out 7 pita flatbreads from the ingredients. I highly recommend that you try this recipe out.

Whole Wheat Pita Pizza with Roasted Apples, Sweet Potato and Caramelized Onion
Adapted from Chef Chloe's recipe

Whole Wheat Pitas (alternately you can purchase or make pizza dough)
Garlic White Bean Puree
    1 (15-ounce) can Cannellini Beans, rinsed and drained
    1/4 cup Olive Oil
    2 tablespoons Water
    1 tablespoon Lemon Juice
    2 Cloves Garlic
    1/2 teaspoon Dried Thyme
    1 teaspoon Sea Salt
    1/2 teaspoon Freshly Ground Black Pepper
Pizza Topping
    4 tablespoons Olive Oil
    1 Onion, thinly sliced
    Sea Salt
    Freshly Ground Black Pepper
    1 large sweet potato, diced
    1 cup spinach
    1 apple, peeled and thinly sliced

1. Preheat the oven to 375 degrees Fahrenheit.
2. In a large skillet, heat 2 tablespoons oil over medium-high heat. Once the oil is hot, add the onions and sprinkle them with salt. Saute until soft and lightly caramelized, about 30 minutes. If they are getting dry, yet haven't browned, you can add a tablespoon or two of water at a time instead of additional oil.
3. While the onions caramelize, toss remaining 2 tablespoons oil with sweet potato and sprinkle with salt and pepper. Transfer to a large rimmed baking sheet and roast for 30 to 35 minutes until squash is fork tender, turning once or twice with a spatula.
4. While the onions caramelize and the sweet potatoes roast, place all the garlic bean puree ingredients in a food processor and process until smooth. If you don't have a food processor, you could put them in a bowl and use an immersion blender. You probably could use a regular blender too.
5. Remove the sweet potatoes from the oven and set aside. Place the whole wheat pitas on a baking sheet and spread a thin layer of the puree over each one's surface. Place the spinach, caramelized onions, sweet potato and apple slices on top.
6. Bake for 5 minutes, rotating midway, until the pitas warm.

Tuesday, November 2, 2010

Pumpkin Butter

Much better than the doughnuts was my first batch of Pumpkin Butter! It not only dressed up/salvaged the doughnuts but it also tastes great on its own, spread on bread or stirred into yogurt for breakfast. Plus it is full of that pumpkin pie spice everyone craves this time of year.

I started from Sarah's recipe using the white pumpkin I picked up during a girl's weekend in the Catskills. I hadn't seen a white pumpkin before but I found its flesh to taste the same as an orange one though it had more of a brown tinge. My changes to her process were substituting maple syrup for white sugar, amping up the cinnamon and cloves and cooking the butter for a mere hour or so over on low on the stove instead of for 8 hours in a slow cooking. The result was lightly sweetened, super smooth bliss. No question this project is worth the time it takes!

When you scoop out the pumpkin's insides be sure to save and roast the seeds for a salty, crunchy and, somehow, healthy snack that will have you wishing you ate whole pumpkins and squash more often. I used Mama Pea's recipe this time and found the addition of vinegar to the usual mix of olive oil and salt to be a good one. 

Pumpkin Butter
Slight adapted from Sarah at All Our Fingers in the Pie

1 Pumpkin
Maple Syrup
Cinnamon
Cloves
Ginger
Nutmeg

1. Preheat the oven to 350 degrees Fahrenheit and spray a baking sheet with olive oil.
2. Cut the pumpkin in half and use a large spoon to scoop out the seeds and pith inside. If you want to roast the pumpkin seeds, save them.
3. Place the pumpkin cut side down on a baking sheet and roast until soft, approximately 30 minutes.
4. Scoop the cooked pumpkin flesh into a food processor and blend until smooth. Add flavorings to taste.  I went with 1/2 cup maple syrup, 1 teaspoon cinnamon, 1/4 teaspoon cloves, 1/8 teaspoon each nutmeg and ginger for each cup of pumpkin. 
5. Transfer the seasoned puree to a large pot and cook on low heat, stirring occasionally, for an hour (or until it reaches the desired texture).


Sunday, October 31, 2010

Chocolate Buttermilk Cake Doughnuts


Happy Halloween! Now on to the belated October Daring Baker's Challenge...

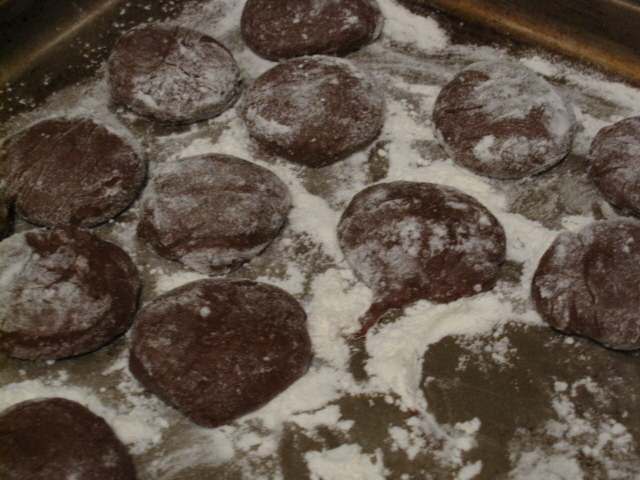
Oh dear. Doughnuts are tough. I grew up loving the sight and meaning of the HOT Krispy Kreme sign in Richmond...fresh glazed doughnuts. Now that I made my own I have a whole new appreciation for doughnuts I can purchase. Leslie compared my chocolate doughnuts to burnt marshmallows, which is a compliment, uh, if you like those. For me it just confirmed the fact that I had a bit of a doughnut disaster for the October 2010 Daring Bakers challenge, which was hosted by Lori of Butter Me Up.

Lori chose to challenge DBers to make doughnuts (obviously) and she made beautiful doughnuts. She used several sources for her recipes including Alton Brown, Nancy Silverton, Kate Neumann and Epicurious. I made the Old Fashioned Buttermilk Cake Doughnuts (page 4) substituting 1/2 cup of flour for cocoa.

They took much longer than the recipe advised - perhaps because I was a novice? Regardless somehow 37 minutes turned into 2 hours. So should you tackle this, leave plenty of time and keep in mind that the dough is VERY, VERY sticky... Only after I added enough flour to make it look like muddy elephant skin did the doughnut holes not stick to the cooking cutter and/or table.

My biggest challenge was regulating the frying oil's temperature. I used 1.5" of canola oil rather than 3," so perhaps that made it more complicated? Either way I have to admit it was fun to watch the dough dip down, bounce up and flip flop all over the place while the holes fried! Somehow in spite of temperature regulation issues the doughnuts weren't greasy though some had doughy centers. 

I can see where these would be delicious and, if you can ignore the slight burnt flavor, mine were rather delicious but in the future I suspect I'll stick to eating other people's fried treats. Frying is messy and wasting all that oil just kills me. The pictured Pumpkin Butter though? I'll take that anytime...more on that later.


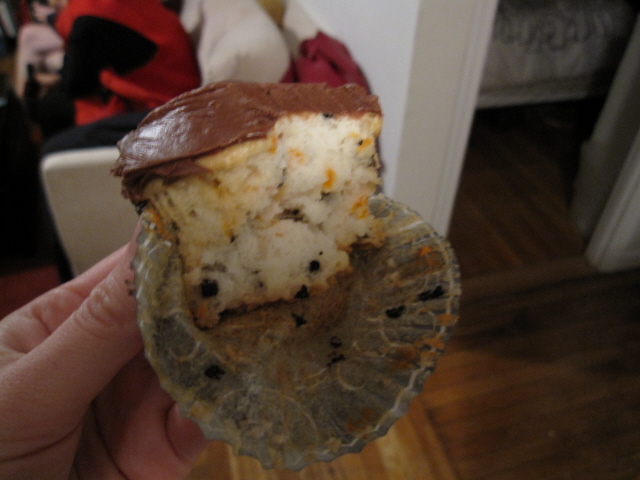
Nothing I make will ever compare to Funfetti? Why is it so, so good?!

Wednesday, October 13, 2010

Not Miso Soup and My 29th Birthday

I tried to ignore turning 29, not because I was worried about it but, because I was worried in advance about turning 30, nothing could have lived up to Spain, I wanted to save my energy with weekends of work ahead of me and every other reason I could throw out. My tendency to get ahead of myself knows no boundaries though I hope to work on taming it, among other things, this year.

Luckily my friends and family refused to ignore the day leaving me feeling special thanks to cards, calls, texts, e-mails, facebook posts and even flowers and sweets from co-workers. Meg's insistence that I not spend it alone resulted in a low key night watching Boardwalk Empire (gorgeous!) while eating good food, which was further improved when Leslie joined us spontaneously.

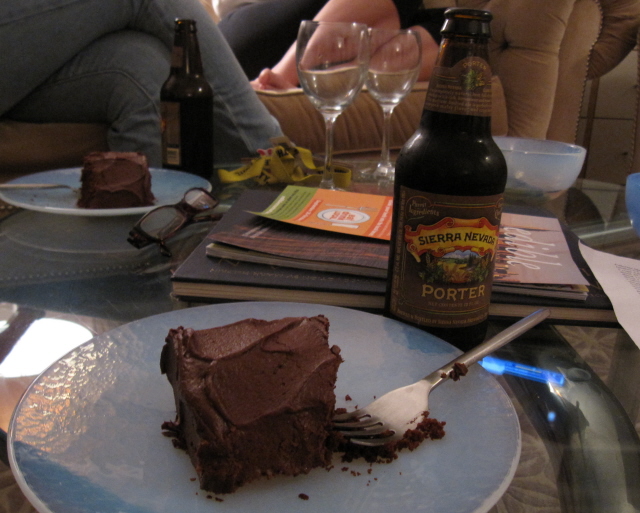
Meg made a refined version of her Chilean Sea Bass and I threw together this Not Miso Soup loosely based on Cathy of Not Eating Out in NY's Celeriac Miso Soup. Meg also surprised me with chocolate cake and stout for a finishing touch. It was a delicious evening relaxing with good company and I don't think it could have been better...except if I hadn't gotten sick the next day.

I promise it wasn't the rich soup with hints of the salty sea below that caused the illness though it was a great comfort in making me feel better. It's like potato-leek soup with an oceanic twist and I like that it doesn't require anything other than Miso paste to make the broth (as I'm often too lazy to make it yet don't like buying it). Plus Miso paste seems to keep forever in the fridge so it is easy to have on hand.

Not Miso Soup
(4-6 Servings)

6 cups Water
3 tbsp Miso Paste
8 trimmed bunches of Shanghai Bok Choy
3 Scallions, greens only
1/3 cup Hijiki, rehydrated
5 Baby Potatoes, diced (the first time I didn't include these and we decided it needed more heft - tofu, white beans or chicken could also add texture)
Salt to taste

1. Put the dehydrated Hijiki in cold water to rehydrate. Rinse scallions, bok choy and the potatoes' exteriors. In a large pot, whisk together 6 cups of water with 3 tablespoons of miso. Heat over medium high until bubbling a bit.
2. Chop scallions, greens only, into 1/8-1/4" rings. Set aside. Trim ends off of bok choy, contemplate that the wasted bits look like rosettes. Peel potatoes and dice them into small to medium cubes.
3. Add potatoes to the miso/water mixture. Set a timer for 15 minutes. Drain Hijiki and rinse it well.
4. When the timer goes off add half the scallions, bok choy and some salt. Let the mixture cook for approximately 5 additional minutes until bok choy wilts and becomes tender. Potatoes should yield easily to a bite but still have texture. Taste. Add more salt if needed.
5. Remove the soup from the stove and stir in the Hijiki. Add remaining scallions. Serve.

Birthday Night Version
  Trial 2 (same week, to make sure this didn't make me sick)
Meg's Delicious Dish

Thursday, October 7, 2010

Grape Focaccia with Rosemary

On September 19, I impulsively bought New York State Concord Grapes thinking I'd try Deb at Smitten Kitchen's Grape Foccacia with Rosemary. While I threw them into sauce for sauteed pork then, I didn't attempt the recipe until last weekend and that only happened because the grapes were showing signs of shrivel! This was my second attempt at a Foccacia-style bread and while it went better than my first where the dough ended up like dinosaur skin it just didn't live up to Luca of the Cavatappo Empire's.

The focaccia's flavor is delicious and the unexpected combination of grapes and rosemary satisfies your desire for sweet and salty in one bite, but it's lack of levity made me think of pizza dough. At first I thought it the density might have come from my mistakes following the recipe -- adding 6 tablespoons of oil to the dough instead of 2 due to poor reading and leaving it in the fridge to rise for almost 14 hours -- but Deb's pictures while much more stunning than mine reveal the same height.

I want my focaccia to be thick and fluffy, so I'll have to keep trying other recipes. Plus halving and seeding all those grapes was too tedious for my taste. It was more fun to be less lady-like and to enjoy them by popping them in my mouth and spitting out the seeds.


Wednesday, October 6, 2010

Homemade Baguettes: Attempts 1 and 2

My current infatuation is attempting to make artisan bread, which all started with baguettes. Back in June Evelyne of Cheap Ethnic Eatz, and Valerie of a The Chocolate Bunny chose pate with freshly baked bread as their June Daring Cook’s challenge. Swamped with moving I skipped it but the thought of making baguettes at home stayed with me and now I've made them twice using their suggested recipe.

Perfecting baguettes is a work in progress but even my imperfect results were pleasing with their crispy exterior and chewy interior with the requisite pockets from air bubbles. This is the perfect project for a long weekend. There's a 50/50 chance of happening again this weekend for me (SO excited to have the extra day off!) and I'd recommend that you try making baguettes too as the bread's delicious - though it goes away all too quickly.

While the recipe can't be halved I have discovered that you can bake the loaves about 5 minutes short of being done, let them cool to room temperature, wrap 'em up and freeze them to finish at a later date. It's the fast way to have baguettes handy and the amazing smell of homemade bread in a short amount of time. Otherwise plan to time out the 19 hour recipe very carefully. My only other note so far is that the second rise can take place for 4-6 hours in the fridge; for me this method resulted in the bread holding its shape better and it let me go out to play.

Almost the full Gossip Girl Season Premiere Spread -- I made everything but the cheese myself! The only thing missing is the improvised cake mentioned here (without instructions as it needs refining).

I suspect my serrated knife isn't as sharp as it needs to be since cutting the slits into the loaves 
distorts them even more than my initial handling!


Wednesday, September 29, 2010

Thomas Keller's Confit Byaldi

Last summer Leslie made Thomas Keller's Confit Byaldi when we viewed Ratatouille and in my frenzy to host the aforementioned Gossip Girl Season Premiere party I decided its deliciousness was the perfect way to incorporate peak seasonal produce and stay in theme. She warned me it took HOURS to prepare but as usual my denial about how long cooking projects will take caused me to think I was superhuman and could create this dish in a mere afternoon. Ha! I was wrong again.

The piperade, chopping and arranging alone took the afternoon... By the time I was ready to cook it at 275 degrees Fahrenheit for 2.5 hours (after which point I could hold it according to the recipe) I was already late leaving for Vika and Rafe's to watch True Blood's season finale. Into the fridge it went, instructions be damned. After I came home I cooked it overnight using my alarm clock at the appropriate intervals. My only change to the recipe was using my dutch oven instead of foil and a dish with lower sides. In the end, it came together and was as sweet and rich as I remembered, but I think Leslie's version was better. I blame my timing in combination with the dutch oven being too large to squeeze under the broiler.

To be honest, I probably won't make this again as I was perfectly content with Smitten Kitchen's simpler version last summer and/or any improvised ratatouille (adding things like radishes, peppers and whatever else might be in the fridge) I've put together since without writing about it. In this case, less time for a great taste wins for me. But if you make it...invite me over to enjoy it please!


Monday, September 27, 2010

Decorated Sugar Cookies

The September 2010 Daring Bakers’ challenge was hosted by Mandy of “What the Fruitcake?!” Mandy challenged everyone to make Decorated Sugar Cookies based on recipes from Peggy Porschen and The Joy of Baking and themed September. September means many things to me -- my birthday, work deadlines and the arrival of Fall -- but I decided, perhaps predictably, to focus on TV shows as my theme. While I often mention TV here I follow just a few shows, usually with friends, and our informal viewing "parties" are perfect for distributing eats.

Earlier this month True Blood came to a close (what a bad ending!) and Gossip Girl began in Paris, so I made two sets of themed cookies. The Royal Icing was meant to be a just bitten red only somehow almost a full bottle of red food coloring left it merely mauve and at 2 a.m. I had had enough fooling around with it. The icing was too thick for flooding (oops) but worked well for piping; even if my illustration skills are weak I think the concepts for both are clear! And, yes, there is a cookie that states "Tights are not pants." It is a rule to live by people.

If you need (or want) to decorate sugar cookies, I'd recommend the linked recipes. The cookies are easy to make with a very almond flavor and a nice crunch that somehow turned back into a delicious dough-y texture in the fridge, over a few weeks of post-viewing storage and slowed consumption, and the frosting wasn't bad to put together either. Just recognize when you start the project that there is chilling time for the dough, cooling time the cookies and setting time for the frosting, so starting at 8 p.m. the night before you want to serve them...while also making baguettes, making and canning applebutter (two other never before done projects) and watching Can't Buy Me Love...is not wise.


Posts on the other French-themed food for Gossip Girls' Season Premiere will follow later this week!

Tuesday, September 21, 2010

Okra Fries

Lara's easy guide to Fried Okra, which I've never attempted to make though I love it, reminded me that I haven't mentioned my favorite way to eat okra of late. Kath of Kath Eats Real Food posts about Okra Fries sometimes and the idea imprinted on my brain. Once I saw okra arrive at the Greenmarket ($4/pound here in New York City), I had to make them right away and have made them once a week for a while now. Kath eats them with ketchup but I find the "fries" more than enough on their own.

This is a very simple way to enjoy okra's crunchy, slightly slippery texture. Since there isn't any tearing involved, these are even simpler than Kale Chips though the process is similar.

Three notes --
1) Red okra will turn green when you cook it (sad).
2) Be careful handling okra because it has prickly hairs on the outside that can get under your skin and cause minor discomfort.
3) I don't eat the stems; I'm all about fiber but that is a bit much for me.

Okra Fries
1. Preheat the oven to 350 degrees Fahrenheit Rinse the okra and pat it dry.
2. Spritz or rub it down with oil, sprinkle with Salt.
3. Roast for approximately 20 minutes in the oven until it begins to brown and shrink a bit in size.
4. Savor as best you can because they will go quick if you're anything like me.

 Jeff sweet talked me into making dinner Sunday night. I served okra fries, sauteed potatoes with persillade (that didn't stay crisp) and sauteed pork chops with a rustic* blackberry-concord grape and shallot sauce.

For dessert we ate leftover Almond-Yogurt Cake with Raspberry Sauce and Candied Ginger Pieces. It was baked in a loaf pan but the texture allowed me to use my cookie cutter to pretty up the presentation. My plate had leftover bits and pieces, which tasted just as good.

*Meaning I didn't strain the sauce to make it smooth! I felt lazy and all my "washable cheesecloth" was waiting for laundry to happen thanks to the raspberry sauce and gazpacho.

Thursday, September 16, 2010

Lime-Vanilla Cupcakes with Cucumber Buttercream

Lime-Vanilla Cupcakes with Cucumber Buttercream sound strange, right? But I promise the only thing they are is strangely delicious. The cupcakes are very light, the cucumber buttercream is refreshing and you'll want to eat them all immediately. Gale and Kimberly said they were the best cupcakes I had ever baked and Kimberly asked that I forward the recipe to her Mom. This one is a keeper.

Almost as exciting as enjoying cupcakes was the fact that I successfully managed to halve a recipe. Perhaps relearning math is working! My only tweaks beyond halving the recipe were increasing the vanilla extract to its 1 teaspoon level and using a mixture of plain soymilk and heavy cream in lieu of regular milk as I didn't have any on hand.

On an separate note, I won the contest Cathy at Not Eating Out in New York hosted a few weeks ago and will be attending Just Food's Let Us Eat Local event tonight. My recipe also will be published in Just Foods' Veggie Tipsheets. I couldn't believe it but I'm very thankful. Best wishes to the other three people who entered the competition, which Cathy recapped here.


Tuesday, September 14, 2010

September 2010 Daring Cooks' Challenge: Applebutter Canned!

The September 2010 Daring Cooks’ challenge was hosted by John of Eat4Fun. John chose to challenge The Daring Cooks to learn about food preservation, mainly in the form of canning and freezing. He challenged everyone to make a recipe and preserve it. John’s source for food preservation information was from The National Center for Home Food Preservation.

This challenge was very intimidating! Canning has been an idea that interests me but also one I've found a reason to avoid. John's challenge left me with no excuse but to face my fear and his meticulous instructions must have left no room for error because I'm the proud owner of a pint of canned apple butter.

My biggest struggle was how to extract the canned applebutter, keeping it level, from my stockpot after the boiling and cooling... I'm very lucky it sealed as I dropped it on its side several times back in the water before realizing I needed to carefully use both the tongs and the spatula, which barely worked. Water creates a lot of drag. Any tips on how to get canned goods out of the water?

In retrospect, I should have purchased two 3 pound bags of apples if I was going to go through the whole process but even having one successfully canned item is exciting. Nevermind that I never want to open the jar as staring at it makes me so happy. Fortunately, I saved the other half of the applebutter and am enjoying it homemade baguette slices, plain yogurt and/or by the spoonful. It's a delicious, cinnamon spiced fruit spread that is perfect for Fall without any added sugar. Even if you don't want to can it, you should make some applebutter to celebrate the new season.

Friday, September 10, 2010

Seared Scallops with Sesame Panko Eggplant and Plum Salsa

I had already started drooling over Just Food's Let Us Eat Local tasting line-up next Thursday, September 16 when I saw Cathy at Not Eating Out in New York post a contest where an amateur cook could win a ticket and have their recipe published Just Food’s upcoming Veggie Tipsheets book. The idea of tasting food from restaurants I have tried and loved as well as many on my restaurant wish list in one night lured me into creating the recipe below, which I attempted to document with more meticulousness than usual.

What started as a Plum Salsa turned into a fairly seasonal festive tower that packs a lot of punch. The salsa mixes sweet and savory thanks to juicy plums, silky sesame oil and bright mint in addition to the usual salsa ingredients. Its soft texture contrasts pleasantly with the Scallops’ caramelized exterior and the crispy Sesame Panko Eggplant rounds. This dish melted in my mouth.

If you don’t enjoys Scallops or want to be frugal, this still tastes great without them. I had plenty of the Sesame Panko Eggplant topped only with Plum Salsa and can tell you with confidence that Scallops aren’t required to make this dish enjoyable though they certainly take the appearance and taste up a notch.

Plum Salsa
3/4 cup plums (approximately 4)
1/3 cup tomato (approximately 1 medium; I used yellow for color and the low acidity)
1 teaspoon mint
2 tablespoons cilantro
1 tsp jalapeño
1/4 cup white onion
1/4 tsp sesame oil
salt to taste

1. Rinse plums, then cut in half, remove pits and chop roughly into small dice. Place 3/4 cup of plums into a small bowl.
2. Rinse tomato, cut across the equator and remove seeds with your finger. Cut out the inner walls (which still taste great so eat them as you go) and then chop the outer skin into small dice. Add roughly 1/3 cup to the bowl.
3. Rinse mint and remove leaves from stem. Lay leaves on top of each other and chop it finely until you have 1 teaspoon. Repeat this step with cilantro until you have 2 tablespoons. Add both to the bowl.
4. Rinse the jalapeño, cut in half and remove stem and seeds. Mince enough for 1 teaspoon and add to the bowl.
5. Remove skin from outside of onion, cut in half through the root end. Dice half of the onion or enough to fill 1/4 cup and add to the bowl.
6. Measure out ¼ teaspoon sesame oil and add it the bowl. Stir everything together gently. Salt to taste. Put in the refrigerator to chill and develop the flavor.

Panko Sesame Eggplant
(based on Chef Richard Ruben’s methodology for baked, crispy eggplant)
1 eggplant

1 cup Panko (or bread crumbs)
2 tablespoons black sesame seeds
salt to taste

2 egg whites
1 tablespoon olive oil
1. Preheat oven to 350 degrees farenheight and cover a baking sheet in foil.
2. Peel eggplant and cut into 1/2 inch rounds, discarding ends. Salt and place in a colander for 15 minutes.
3. While eggplant sits, combine Panko, black sesame seeds and salt on a small plate or in a shallow bowl.
4. In a separate bowl whisk together egg whites and olive oil.
5. Rinse eggplant and pat dry. Dip eggplant in egg white and olive oil mixture until coated. Then dip in the panko mixture. Place on prepared baking sheet.
6. Once all eggplant is resting on the baking sheet, place it in the oven for approximately 20 minutes or until lightly browned and crispy. (For me the top never browned though unbeknownst to me the bottom did.)
7. Remove from oven and set to the side.

Seared Scallops
Olive Oil
Salt
Scallops (I defrosted New England Scallops from Trader Joe’s)

1. Pat scallops dry and salt them.
2. Heat a pan over medium high heat. Add olive oil. When the olive oil becomes fluid enough to spread through the pan, add scallops to it.
3. Cook 2-4 minutes on each side. The scallops are done on one side when they move easily when touched by the spatula.
4. Remove caramelized scallops to paper towel to drain.

To Assemble the final dish…
1. Place a scallop on the eggplant, then top with plum salsa.
2. Enjoy

*I actually tried a few ideas but this was my biggest success. One was so awful that I couldn’t even make myself eat the leftovers. Major fail.

Tuesday, September 7, 2010

Tropical Granola

Ever ambitious I attempted two different granola bar recipes for my family vacation to Glacier National Park in Montana and Waterton International Peace Park in Alberta, Canada last month. My adapted version of Nicole at Baking Bite's Coconut, Almond Cranberry Granola Bars resulted in granola instead of granola bars. Oops. While granola isn't the most portable, this was a tasty mistake and is a recipe I'll revisit. Maybe one day I'll even make the original version following all the instructions!

This granola tastes like a beach vacation thanks to the dried pineapple, papaya, mango and coconut. It's lightly sweet with occasional taste-bud sparking touches of salt and I've been very happy eating it, slowly to make it last as long as possible. The use of Buckwheat, which adds a bit of crunch, was inspired by Kath Eats Real Food.

Tropical Granola
3 1/2 cups rolled oats
1/2 cup buckwheat (for some crunch)
1/2 cup almond meal
1/2 cup ground flaxseed
1/2 cup unsweetened, shredded coconut
1/2 cup agave syrup
1/2 cup brown sugar
1/4 cup vegetable oil
1 tsp vanilla extract
1/4 tsp salt (mine was large, kosher flakes which made the salt really pop out)
3/4 cup chopped, dried pineapple, mango and papaya (used no sugar added where possible)

Line a 9×9″ square baking pan with parchment paper or aluminum foil, lightly greased.
In a large bowl, combine oats, buckwheat, almond meal, ground flaxseed and coconut.
In a small saucepan, combine agave syrup, brown sugar and vegetable oil. Bring to a boil, whisking to dissolve sugar. Remove from heat and stir in vanilla extract and salt. Pour into oat mixture and stir until dry ingredients are evenly moistened. At this point it should look something like unbaked granola. Stir in dried pineapple, mango and papaya.
Pour mixture into prepared pan and press down into an even layer. Let it cool, crumble it out eating bites and then store the remainder to enjoy during the week (or longer if you refrigerate it).

This lovely little baggie of granola was enjoyed at Crypt Lake in Waterton International Peace Park. After taking a ferry, my brother, myself and the rest of the passengers trekked past 4 waterfalls, climbed a small ladder, crawled through a tunnel and crept along a ledge holding a wire to reach an elevation of 2,200 feet and the aforementioned lake. On the way back we took an extension to see Hellroaring Falls, which were noisy but a bit weak as it was August. This was the hardest hike I've done to date - we conquered the approximately 11.2 miles in approximately 6.5 hours. :)


Friday, September 3, 2010

10 Downing

Since making Chef Fish Lydon's Butterscotch Pudding I had wanted to visit 10 Downing. Thanks to Meg's amazing organizational skills I was able to do so during Restaurant Week in July with her, Holly and Laurie. When I looked up the menu I saw they were only offering a Coffee Butterscotch Pot de Creme, so I knew my dessert dream would go unfilled but I figured what the heck.10 Downing is an open space with outdoor seating, eclectic decor, and a very high ceiling, which causes it to be quite loud. Its service was erratic but not so much so that I'd attribute it to anything beyond Restaurant Week's frenzy.

To start we devoured the complimentary slightly grainy White Bean Hummus (?) accompanied by toothsome Ciabatta Bread and then savored the Chilled Tomato Soup with Watercress and Micro Basil, a refreshing and creamy soup with a cooling cucumber flavor. Our table ordered two of each entree: Pan-Roasted Diver Scallops with Sauteed Clams, Sweet Corn and Tarragon and Grilled Spiced Rubbed Tri-Tip with Radicchio, Farro and Bone Marrow Jus. Obviously I had the "sea marshmallows," which were expertly cooked. I couldn't stop scooping up the silky scallops with their crispy, caramelized exterior and the creamy, sweet corn. The Tri-Tip wasn't as good: the meat was a little tough and the sweet, charred Radicchio caused conflicted feelings. Was it addictive or off putting?

For dessert, I chose the Humbolt Fog Goat Cheese with Tomato Jam, Toast and Candied Walnuts to be  contrarian; everyone else had the ButterMilk Panna Cotta with Roasted Peaches in Balsamic Syrup, which was the better choice. The Panna Cotta was smooth and slightly sweet with an unlisted hint of citrus; the peaches in syrup were surprisingly sour but I assume this was intentional as it encouraged me to savor the whole dish rather than consume the pieces. My dessert's highlight was the crunchy, buttery, salty and sweet candied walnuts. I would have been to happy to have a cup of them alone!

Now we come to the part of dinner where 10 Downing KILLED me. Their in restaurant menu had Butterscotch Pot de Creme listed with no mention of coffee. I squealed and immediately ordered it while my friends waited patiently. You can imagine what happens next. It arrives, I gaze lovingly at it and spoon in to find the flavor to be coffee. I was crushed and after encouragement from my friends explained the disappointment to the server and it was kindly removed from the bill - very nice of them.

Overall, our consensus was that we really wanted to like 10 Downing but were disappointed with the food for their price point. Their menu descriptions were somewhat misleading and while enjoyable the food was a touch oversalted. That said I'm glad I went and wouldn't tell anyone NOT to go though I don't have grand and glorious plans to go back (irregardless of the Butterscotch Pot de Creme's menu status).

Location: 10 Downing Street (at Sixth Avenue just south of Bleecker Street)
Hours: Lunch Tuesday - Friday 12-3 p.m.; Dinner Daily 5:30-12 a.m.; Brunch Saturday & Sunday 10-4 p.m. 
Cost: $$$