Our Daring Cooks’ December 2011 hostess is Sara from Belly Rumbles! Sara chose awesome Char Sui Bao as our challenge, where we made the buns, Char Sui, and filling from scratch – delicious! And I'm only a week late telling you about it.
Sara performed exhaustive research: testing marinades, grilling, searing and baking and baking char sui and then making several variations on buns: baked, steamed and vegetarian. You can see all of her work here. I used her alternative marinade without red food colouring or maltose and made the I-don't-want-to-go-to-the-store substitution of Sherry for Shaoxing Cooking Wine. As Sara said grilling gave the best result, I had my Dad work his magic on the pork with a result so beautiful that I was almost sad to dice it to create the filling for the buns.
The hardest part was figuring out how to steam buns without a bamboo steamer. Ultimately, I used a vegetable steamer insert in
a large stock pot removing the lid as
quickly as possible when steaming finished and drying it before replacing it over the next batch. This minimized condensation
droplets hitting the buns and prevented unsightly blemishes. It also made me feel a bit like a magician!
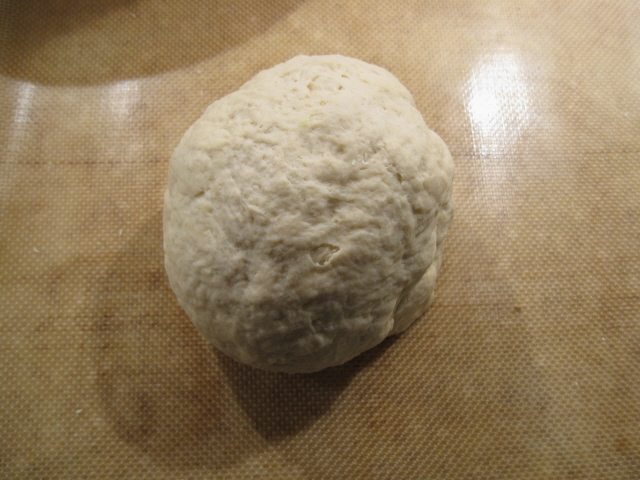
This challenge took some time, but was surprisingly easy and my buns tasted just
like the cheap, tasty, steamed buns I used to purchase in NYC's
Chinatown. I highly recommend it; the recipes I used are below the photos and Sara's other variations can be found at the above link.
Showing posts with label daring cooks. Show all posts
Wednesday, December 21, 2011
Monday, November 14, 2011
Green Tea, Tofu, and Noodle Soup
Sarah from Simply Cooked was our November Daring Cooks’ hostess and she
challenged us to create something truly unique in both taste and
technique! We learned how to cook using tea with recipes from Tea Cookbook by Tonia George and The New Tea Book by Sara Perry.
We could choose our own savory, tea-based recipe or make Beef Braised in Rooibos Tea with Sweet Potatoes, Chinese Tea Eggs and Green Tea, Tofu, and Noodle Soup. As I constantly feel like the rabbit in Alice in Wonderland right now I was thrilled that the Green Tea, Tofu, and Noodle Soup required only 30-minutes and I chose it so I could complete my first challenge in months.
I followed the provided recipe using local napa cabbage for the greens, substituting soba noodles for the egg noodles and adding cilantro for visual flair (and flavor) at the end. The broth was very delicate, too much so for my taste. I ended up adding lime juice, s'rircha and additional soy sauce and sesame oil to amp up the flavor yet still felt like something was missing. Perhaps the soba noodles were too much for the broth? Either way I don't plan to revisit the recipe.
That said based on the descriptors used by my fellow Daring Cooks - luscious, refreshing and delicious - I will be looking further into cooking with tea. Especially as tea is a great way to add flavor without calories or a lot of cost. View the recipes and Sarah's other ideas for cooking with tea here and check out those tasty sounding results here.
We could choose our own savory, tea-based recipe or make Beef Braised in Rooibos Tea with Sweet Potatoes, Chinese Tea Eggs and Green Tea, Tofu, and Noodle Soup. As I constantly feel like the rabbit in Alice in Wonderland right now I was thrilled that the Green Tea, Tofu, and Noodle Soup required only 30-minutes and I chose it so I could complete my first challenge in months.
I followed the provided recipe using local napa cabbage for the greens, substituting soba noodles for the egg noodles and adding cilantro for visual flair (and flavor) at the end. The broth was very delicate, too much so for my taste. I ended up adding lime juice, s'rircha and additional soy sauce and sesame oil to amp up the flavor yet still felt like something was missing. Perhaps the soba noodles were too much for the broth? Either way I don't plan to revisit the recipe.
That said based on the descriptors used by my fellow Daring Cooks - luscious, refreshing and delicious - I will be looking further into cooking with tea. Especially as tea is a great way to add flavor without calories or a lot of cost. View the recipes and Sarah's other ideas for cooking with tea here and check out those tasty sounding results here.
Thursday, July 21, 2011
Spaetzle, Zucchini and Peppers with an improvised Green Curry Sauce
Steph from Stephfood was our Daring Cooks' July hostess. Steph challenged us to make homemade noodles without the help of a motorized pasta machine. She provided us with recipes for Spätzle and Fresh Egg Pasta as well as a few delicious sauces to pair our noodles with! I appreciated her willingness to let everyone experiment with their own variations on the theme based on their personal preferences, dietary requirements and/or financial restraints.
Since the spätzle was her Dad's recipe, and it was estimated to take 30-minutes, I chose to tackle it instead of fresh egg pasta. My previous attempt at spaetzle involved squeezing it through a potato ricer and resulted in brain like squiggly masses; the tablespoon method Steph and her Dad endorse treated me better. The resulting spaetzle reminded me of dumplings, though not as soft to the bite and sans butter.
As in our house no meal is complete without a vegetable or two, I decided to drop chopped squash and yellow bell pepper into the boiling water during the last minute or so. This made it simple, summery and minimized the number of additional dishes used. The green curry sauce gave it some added zest, thank goodness as the lemon zest I had thrown in did nothing to add flavor thus it is missing from the spätzle recipe below. I would happily revisit this again, though perhaps with a revised or different sauce, and suggest that you consider trying it as long as you like dumplings and/or gnocchi.
Thanks for the reminder to not give up on spätzle, Steph!
German Spätzle
Yields approximately 15 spätzle pieces
2 Large Eggs
1/2 cup Milk (Any type works - I used Coconut.)
1 1/2 cups All-Purpose Flour (I needed 1/4 cup extra.)
1 tablespoon chopped Basil (up to 1 tablespoon of any herbs and spices can be used.)
1/2 teaspoon Salt
1 tablespoon chopped Basil (for decoration)
1 medium Zucchini, chopped
1 Yellow Bell Pepper, chopped
1. Bring a large pot of water to boil.
2. In a large bowl, whisk together eggs, milk and any herbs and spices.
3. Sift in 1/3 of the flour into the liquid mixture and stir until incorporated. Continue adding the flour until the dough is elastic, smooth and very hard to stir.
4. Dip a tablespoon into the boiling water, pour the water out. Scoop up enough dough to fill the moistened tablespoon halfway and drop the dough into the boiling water. Continue until all dough is in the water.
5. Boil for 15 to 20 minutes. If desired, add the zucchini and squash for the last minute to minute and half to blanch it. While the spätzle boils make your sauce.
6. Drain the spätzle and veggies thoroughly.
7. Place the them in a dish and pour a little sauce over each spätzle (you want just enough to dress them lightly). Top with the the chopped basil.
Improvised Green Curry Sauce
1/2 cup Coconut Milk
2 teaspoons Green Curry Paste
1/4 teaspoon Salt
1/4 teaspoon Cornstarch
1 tablespoon Shredded, Unsweetened Coconut
1. Whisk together coconut milk, curry paste and cornstarch in a bowl. Heat in the microwave for a minute. Whisk again. Continue until it has reduced/thickened to the desired consistency.
2. Stir in shredded coconut.
Since the spätzle was her Dad's recipe, and it was estimated to take 30-minutes, I chose to tackle it instead of fresh egg pasta. My previous attempt at spaetzle involved squeezing it through a potato ricer and resulted in brain like squiggly masses; the tablespoon method Steph and her Dad endorse treated me better. The resulting spaetzle reminded me of dumplings, though not as soft to the bite and sans butter.
As in our house no meal is complete without a vegetable or two, I decided to drop chopped squash and yellow bell pepper into the boiling water during the last minute or so. This made it simple, summery and minimized the number of additional dishes used. The green curry sauce gave it some added zest, thank goodness as the lemon zest I had thrown in did nothing to add flavor thus it is missing from the spätzle recipe below. I would happily revisit this again, though perhaps with a revised or different sauce, and suggest that you consider trying it as long as you like dumplings and/or gnocchi.
Thanks for the reminder to not give up on spätzle, Steph!
German Spätzle
Yields approximately 15 spätzle pieces
2 Large Eggs
1/2 cup Milk (Any type works - I used Coconut.)
1 1/2 cups All-Purpose Flour (I needed 1/4 cup extra.)
1 tablespoon chopped Basil (up to 1 tablespoon of any herbs and spices can be used.)
1/2 teaspoon Salt
1 tablespoon chopped Basil (for decoration)
1 medium Zucchini, chopped
1 Yellow Bell Pepper, chopped
1. Bring a large pot of water to boil.
2. In a large bowl, whisk together eggs, milk and any herbs and spices.
3. Sift in 1/3 of the flour into the liquid mixture and stir until incorporated. Continue adding the flour until the dough is elastic, smooth and very hard to stir.
4. Dip a tablespoon into the boiling water, pour the water out. Scoop up enough dough to fill the moistened tablespoon halfway and drop the dough into the boiling water. Continue until all dough is in the water.
5. Boil for 15 to 20 minutes. If desired, add the zucchini and squash for the last minute to minute and half to blanch it. While the spätzle boils make your sauce.
6. Drain the spätzle and veggies thoroughly.
7. Place the them in a dish and pour a little sauce over each spätzle (you want just enough to dress them lightly). Top with the the chopped basil.
Improvised Green Curry Sauce
1/2 cup Coconut Milk
2 teaspoons Green Curry Paste
1/4 teaspoon Salt
1/4 teaspoon Cornstarch
1 tablespoon Shredded, Unsweetened Coconut
1. Whisk together coconut milk, curry paste and cornstarch in a bowl. Heat in the microwave for a minute. Whisk again. Continue until it has reduced/thickened to the desired consistency.
2. Stir in shredded coconut.
Tuesday, June 14, 2011
Five Layer Fiesta Potato Salad
Jami Sorrento was our June Daring Cooks hostess and she chose to challenge us to celebrate the humble spud by making a delicious and healthy potato salad. The Daring Cooks Potato Salad Challenge was sponsored by the nice people at the United States Potato Board, who awarded prizes to the top 3 most creative and healthy potato salads. A medium-size (5.3 ounce) potato has 110 calories, no fat, no cholesterol, no sodium and includes nearly half your daily value of vitamin C and has more potassium than a banana!
Jami provided recipes for Green Bean Potato Salad, Creamy Yogurt and Dill Potato Salad, Light Potato Salad and German Potato Salad. You can check them and the full challenge out here. Thank you for a fun and tasty challenge, Jami. This challenge definitely inspired me as you can see below.
-------------
Have you ever had seven layer dip? In case you haven't, it consists of refried beans, taco seasoning, tomatoes, guacamole, cheese, sour cream, green onions and olives layered in a dish. It is addictive. I've been known to demolish it and a bag of tortilla chips at parties...by myself...not healthy and mildly embarrassing.
Inspired by that special occasion dip I created this Five Layer Fiesta Potato Salad, which fills the same craving without the messy fingers or crazy calorie intake. The nutrient dense ingredients are filling and include a good amount of dietary fiber since the skin stays on the potatoes. Keeping the ingredients layered makes for an attractive presentation that is still party perfect - at least until the first scoop happens.
Who wants traditional Seven Layer Dip only at parties when you can have this salad anytime? Feel free to tweak the recipe for your own purposes... I may add black beans in the future.
Five Layer Fiesta Potato Salad
3 Red Potatoes (approximately 1 1/4 pounds)
1 Orange Bell Pepper
2 Avocados
1 Lime
3/4 cup Salsa
1/2 tablespoon Cumin
1/2 teaspoon Garlic Powder
1/2 teaspoon Salt
1/4 teaspoon Cayenne Pepper
1/2 cup Reduced Fat Cheddar Cheese (l like Cabot's 75% Reduced Fat Cheddar.)
1/4 cup Chopped Cilantro
1. Scrub the potatoes and remove all projecting eyes/dents. Dice into 1/2 inch cubes placing them into a large pot half full of water as you go. Once all the potatoes are in the pot, turn the burner up to high and bring the water to a boil. Boil the potatoes for approximately 27 minutes or until potatoes yield easily to biting but retain their shape. Drain potatoes and rinse with cold water to prevent additional cooking.
2. While the potatoes boil, dice the orange pepper into 1/2 inch pieces. Cut the avocado into 1/2 inch cubes, placing them in a container and squeezing half of the lime over them to prevent browning. Remove the cilantro leaves from the stems and chop enough to fill 1/4 cup.
3. Place the drained potatoes into a mixing bowl. Squeeze the other half lime over them. Add 1/2 tablespoon cumin, 1/2 teaspoon garlic powder, 1/2 teaspoon salt and 1/4 teaspoon cayenne pepper. Toss to combine.
4. Move the potato mixture to a serving bowl. This is your first layer.
5. Top the potatoes with the orange pepper, then add the avocado on top of it. Pour the salsa over the avocado.
6. Sprinkle the avocado with cheese, then cilantro.
7. Chill until ready to serve. It can be served a room temperature or cold.
Jami provided recipes for Green Bean Potato Salad, Creamy Yogurt and Dill Potato Salad, Light Potato Salad and German Potato Salad. You can check them and the full challenge out here. Thank you for a fun and tasty challenge, Jami. This challenge definitely inspired me as you can see below.
-------------
Have you ever had seven layer dip? In case you haven't, it consists of refried beans, taco seasoning, tomatoes, guacamole, cheese, sour cream, green onions and olives layered in a dish. It is addictive. I've been known to demolish it and a bag of tortilla chips at parties...by myself...not healthy and mildly embarrassing.
Inspired by that special occasion dip I created this Five Layer Fiesta Potato Salad, which fills the same craving without the messy fingers or crazy calorie intake. The nutrient dense ingredients are filling and include a good amount of dietary fiber since the skin stays on the potatoes. Keeping the ingredients layered makes for an attractive presentation that is still party perfect - at least until the first scoop happens.
Who wants traditional Seven Layer Dip only at parties when you can have this salad anytime? Feel free to tweak the recipe for your own purposes... I may add black beans in the future.
Five Layer Fiesta Potato Salad
3 Red Potatoes (approximately 1 1/4 pounds)
1 Orange Bell Pepper
2 Avocados
1 Lime
3/4 cup Salsa
1/2 tablespoon Cumin
1/2 teaspoon Garlic Powder
1/2 teaspoon Salt
1/4 teaspoon Cayenne Pepper
1/2 cup Reduced Fat Cheddar Cheese (l like Cabot's 75% Reduced Fat Cheddar.)
1/4 cup Chopped Cilantro
1. Scrub the potatoes and remove all projecting eyes/dents. Dice into 1/2 inch cubes placing them into a large pot half full of water as you go. Once all the potatoes are in the pot, turn the burner up to high and bring the water to a boil. Boil the potatoes for approximately 27 minutes or until potatoes yield easily to biting but retain their shape. Drain potatoes and rinse with cold water to prevent additional cooking.
2. While the potatoes boil, dice the orange pepper into 1/2 inch pieces. Cut the avocado into 1/2 inch cubes, placing them in a container and squeezing half of the lime over them to prevent browning. Remove the cilantro leaves from the stems and chop enough to fill 1/4 cup.
3. Place the drained potatoes into a mixing bowl. Squeeze the other half lime over them. Add 1/2 tablespoon cumin, 1/2 teaspoon garlic powder, 1/2 teaspoon salt and 1/4 teaspoon cayenne pepper. Toss to combine.
4. Move the potato mixture to a serving bowl. This is your first layer.
5. Top the potatoes with the orange pepper, then add the avocado on top of it. Pour the salsa over the avocado.
6. Sprinkle the avocado with cheese, then cilantro.
7. Chill until ready to serve. It can be served a room temperature or cold.
Monday, May 16, 2011
Gumbo, Revisited
Our May hostess, Denise, of There’s a Newf in My Soup!, challenged The Daring Cooks to make Gumbo! She provided us with all the recipes we’d need, from creole spices, homemade stock, and Louisiana white rice, to Drew’s Chicken & Smoked Sausage Gumbo and Seafood Gumbo from My New Orleans: The Cookbook, by John Besh. Last June I made Paula Deen's Gumbo with my friend, Meg, and really enjoyed the final product so I was happy to revisit it. Thank you for the reminder, Denise!
For the challenge, I made a half portion of Drew’s Chicken & Smoked Sausage Gumbo without the file powder as I couldn't find it locally. I chose to use the full amount of okra since I love its slippery texture and felt like the extra bright green pretties up the gumbo. I reduced the oil at the start a bit more than half and didn't find the texture of the final product to be adversely affected.
I have two tips for you when you make gumbo:
1. When you add the onions to the roux have a snack ready as the mixture smells just like hush puppies and the gumbo won't be ready to eat for quite a while.
2. Don't start gumbo at 7 p.m., especially if you are leaving town at 12:30 a.m. and planning to say hello to the grandparents across town before you leave. Gumbo will win, the grandparents will be sad and you will feel guilty. However, you won't resent the gumbo too much as its savory, smoky flavor is irresistible. Its only drawbacks are the cooking time and the expense of multiple meats. Save it for the weekend and budget wisely but definitely make it.
Since I enjoy the flavor so much I think I'll try a vegetarian version next to see how it compares. I'll let you know.
Drew’s Chicken & Smoked Sausage Gumbo
Minimally adapted from My New Orleans: The Cookbook, by John Besh
Serves 5-6
1/3 cup Canola Oil
1/2 cup Flour
1 Large Onion, Diced
1/2 Chicken (1 1/2 to 2 lbs), cut into 5 pieces (I removed whatever skin came off easily but leaving it on is fine.)
1 tablespoon Basic Creole Spices (recipe follows), or store-bought Creole spice blend
1 pound Spicy Smoked Sausage, sliced 1/2 inch thick
1 stalk Celery, diced
1 Green Bell Pepper, seeded and diced
1 small Tomato, seeded and chopped
1 Cloves Garlic, minced
Leaves from 1 sprig of fresh Thyme
1.5 quarts (6 cups) Chicken Stock (I used defatted homemade stock mixed with veggie broth since that is what I had on hand.)
1 Bay Leaf
3 ounces Andouille Sausage, chopped
2 cups (11 ounces) sliced frozen okra (fresh would work too but it isn’t the time for it in Va.)
1/2 tablespoon Worcestershire sauce
Salt, Pepper, Filé powder and Tabasco, to taste (I didn’t add any of these items!)
4-6 cups Rice or Grain of your Choice
1. Prepare homemade chicken stock, if using.
2. Prepare homemade Basic Creole Spices. (Recipe below.)
3. Season the chicken pieces with about 1 tablespoon of the Creole.
4. Cut, dice, chop and mince all of your vegetables.
5. In a large cast-iron or heavy-bottomed pan, heat the canola oil over high heat. Whisk the flour into the hot oil – it will start to sizzle. Reduce the heat to moderate, and continue whisking until the roux becomes deep brown in color, about 15 minutes. Don’t step away as it will burn!
6. Add the onions. Switch to a wooden spoon and stir the onions into the roux. Reduce the heat to medium-low. Continue stirring until the roux becomes dark brown, about 10 minutes.
7. Add the chicken to the pot; raise the heat to moderate, and cook, turning the pieces until slightly browned, about 10 minutes.
8. Add the sliced smoked sausage and stir for about a minute.
9. Add the celery, bell peppers, tomato, and garlic, and continue stirring for about 3 minutes.
10. Add the thyme, chicken stock, and bay leaves. Bring the gumbo to a boil, stirring occasionally.
11. Reduce the heat to medium-low and simmer, uncovered, for 45 minutes. Stir occasionally, skimming off the fat from the surface of the gumbo every so often.
12. Add the chopped andouille, okra, and Worcestershire. If desired, season with salt and pepper, several dashes of filé powder, and Tabasco, all to taste.
13. Simmer for another 45 minutes, continuing to skim the fat from the surface of the gumbo. Remove the bay leaves and serve in bowls over rice. Pass more filé powder at the table if desired.
Basic Creole Spice
From My New Orleans: The Cookbook, by John Besh
Makes 1/4 cup. Can be stored for up to 6 months.
1 tablespoon Celery Salt
1/2 tablespoon Sweet Paprika
1/2 tablespoon Coarse Sea Salt
1/2 tablespoon Freshly Ground Black Pepper
1/2 tablespoon (15 ml) (7 gm) garlic powder
1/2 tablespoon (15 ml) (7 gm) onion powder
1 teaspoon Cayenne Pepper
1/4 teaspoon Ground Allspice
1. Mix together all spices in a bowl.
2. Transfer the spices to a clean container with a tight-fitting lid.
I chose this song in honor of Gossip Girls' Season Finale tonight. I can't imagine what new drama they will have cooked up this week...
For the challenge, I made a half portion of Drew’s Chicken & Smoked Sausage Gumbo without the file powder as I couldn't find it locally. I chose to use the full amount of okra since I love its slippery texture and felt like the extra bright green pretties up the gumbo. I reduced the oil at the start a bit more than half and didn't find the texture of the final product to be adversely affected.
I have two tips for you when you make gumbo:
1. When you add the onions to the roux have a snack ready as the mixture smells just like hush puppies and the gumbo won't be ready to eat for quite a while.
2. Don't start gumbo at 7 p.m., especially if you are leaving town at 12:30 a.m. and planning to say hello to the grandparents across town before you leave. Gumbo will win, the grandparents will be sad and you will feel guilty. However, you won't resent the gumbo too much as its savory, smoky flavor is irresistible. Its only drawbacks are the cooking time and the expense of multiple meats. Save it for the weekend and budget wisely but definitely make it.
Since I enjoy the flavor so much I think I'll try a vegetarian version next to see how it compares. I'll let you know.
Drew’s Chicken & Smoked Sausage Gumbo
Minimally adapted from My New Orleans: The Cookbook, by John Besh
Serves 5-6
1/3 cup Canola Oil
1/2 cup Flour
1 Large Onion, Diced
1/2 Chicken (1 1/2 to 2 lbs), cut into 5 pieces (I removed whatever skin came off easily but leaving it on is fine.)
1 tablespoon Basic Creole Spices (recipe follows), or store-bought Creole spice blend
1 pound Spicy Smoked Sausage, sliced 1/2 inch thick
1 stalk Celery, diced
1 Green Bell Pepper, seeded and diced
1 small Tomato, seeded and chopped
1 Cloves Garlic, minced
Leaves from 1 sprig of fresh Thyme
1.5 quarts (6 cups) Chicken Stock (I used defatted homemade stock mixed with veggie broth since that is what I had on hand.)
1 Bay Leaf
3 ounces Andouille Sausage, chopped
2 cups (11 ounces) sliced frozen okra (fresh would work too but it isn’t the time for it in Va.)
1/2 tablespoon Worcestershire sauce
Salt, Pepper, Filé powder and Tabasco, to taste (I didn’t add any of these items!)
4-6 cups Rice or Grain of your Choice
1. Prepare homemade chicken stock, if using.
2. Prepare homemade Basic Creole Spices. (Recipe below.)
3. Season the chicken pieces with about 1 tablespoon of the Creole.
4. Cut, dice, chop and mince all of your vegetables.
5. In a large cast-iron or heavy-bottomed pan, heat the canola oil over high heat. Whisk the flour into the hot oil – it will start to sizzle. Reduce the heat to moderate, and continue whisking until the roux becomes deep brown in color, about 15 minutes. Don’t step away as it will burn!
6. Add the onions. Switch to a wooden spoon and stir the onions into the roux. Reduce the heat to medium-low. Continue stirring until the roux becomes dark brown, about 10 minutes.
7. Add the chicken to the pot; raise the heat to moderate, and cook, turning the pieces until slightly browned, about 10 minutes.
8. Add the sliced smoked sausage and stir for about a minute.
9. Add the celery, bell peppers, tomato, and garlic, and continue stirring for about 3 minutes.
10. Add the thyme, chicken stock, and bay leaves. Bring the gumbo to a boil, stirring occasionally.
11. Reduce the heat to medium-low and simmer, uncovered, for 45 minutes. Stir occasionally, skimming off the fat from the surface of the gumbo every so often.
12. Add the chopped andouille, okra, and Worcestershire. If desired, season with salt and pepper, several dashes of filé powder, and Tabasco, all to taste.
13. Simmer for another 45 minutes, continuing to skim the fat from the surface of the gumbo. Remove the bay leaves and serve in bowls over rice. Pass more filé powder at the table if desired.
Basic Creole Spice
From My New Orleans: The Cookbook, by John Besh
Makes 1/4 cup. Can be stored for up to 6 months.
1 tablespoon Celery Salt
1/2 tablespoon Sweet Paprika
1/2 tablespoon Coarse Sea Salt
1/2 tablespoon Freshly Ground Black Pepper
1/2 tablespoon (15 ml) (7 gm) garlic powder
1/2 tablespoon (15 ml) (7 gm) onion powder
1 teaspoon Cayenne Pepper
1/4 teaspoon Ground Allspice
1. Mix together all spices in a bowl.
2. Transfer the spices to a clean container with a tight-fitting lid.
Find more songs like Good Girls Go Bad [feat. Leighton Meester] at Myspace Music
I chose this song in honor of Gossip Girls' Season Finale tonight. I can't imagine what new drama they will have cooked up this week...
Thursday, April 14, 2011
Work in Progress: Soft Pretzel Bowls
Renata of Testado, Provado & Aprovado! was our Daring Cooks’ April 2011 hostess. Renata challenged us to think “outside the plate” and create our own edible containers. Prizes are being awarded to the most creative edible container and filling, so vote on your favorite from April 17th to May 16th at http://thedaringkitchen.com!
This project was a fascinating one. Everyone has come up with amazing, unique and, often beautiful, containers that I would love to eat. Sadly in spite of multiple attempts I don't have a finished product to share. But I will... Soft pretzel bowls are going to happen and I'm getting close. Maybe next month?
Here are miscellaneous pictures of my process thus far with descriptions as I'm short on time.
This project was a fascinating one. Everyone has come up with amazing, unique and, often beautiful, containers that I would love to eat. Sadly in spite of multiple attempts I don't have a finished product to share. But I will... Soft pretzel bowls are going to happen and I'm getting close. Maybe next month?
Here are miscellaneous pictures of my process thus far with descriptions as I'm short on time.
Right: Roasted Beets and Asparagus with Diced Horseradish Cheese
Left: Mushrooms in a Sherry-Paprika Sauce with Parsley (for color)
The yeast was bubbly...a good start.
Too dry...Add more buttermilk.
The dough isn't that smooth but it will do. I'm trying to learn the mantra
don't let the perfect get in the way of the good.
It doubled. Score.
The dough rolled out and cut into circles.
They browned much better than the previous batch and yet were still a touch too crisp.
Midnight last night. Hello, disaster. I told myself tomorrow is a new day and went to bed
once the pan was soaking. The gray cloud is still following me around today thought...
must see struggles as opportunities and continue to move forward.
Find more David LaMotte songs at Myspace Music
Tuesday, March 15, 2011
Ceviche de Pescado and Not Papas Rellanas
My first trip out of the country was in 2004. I visited Guayaquil, Salinas, Montanita and Cuenca, Ecuador for New Years with friends, who I hadn't actually met in person yet. The adventure opened my eyes to a new culture and new foods. I will never forget all of the fireworks and exploding pinatas, the variety of car horns you heard navigating the crowded streets, the ocean's bath-like water temperature, the "raining" locusts and discovering just how privileged we are in the US to have the sanitation system we do.
In spite of later trips to Italy, Cyprus and Spain, South American food has stayed in my head. I just can't approximate it as well as the other cuisines. I still dream about the tangy, soup-like ceviche served with popcorn, the creamy, cheesy grilled corn (choclos not to be confused with cholos) available for a dollar on the street, cilantro rice, and fresh pina coladas. Needless to say when Kathlyn introduced this month's challenge by describing her love of South American food's flavor I was excited.
Kathlyn of Bake Like a Ninja was our Daring Cooks’ March 2011 hostess. Kathlyn challenged us to make two classic Peruvian dishes: Ceviche de Pescado from “Peruvian Cooking – Basic Recipes” by Annik Franco Barreau. And Papas Rellenas adapted from a home recipe by Kathlyn’s Spanish teacher, Mayra. You can find the full challenge background and recipes here; the recipes updated with my variations are below.
I've tried making ceviche before but this version turned out much better. It keeps things simple so the citrus cooked fish stays the main event (as it should). I incorporated pink grapefruit into the ceviche for some additional color and reduced the provided recipe by half but otherwise followed it. I'm delighted to say that my Mom's Venzuelan co-worker said it was perfect so congrats to Kathlyn for finding something authentic enough to please a South American.
As for the Papas Rellanas I really went off the reservation. While I read through the recipe and largely followed it, what I made couldn't really be called Papas Rellanas since I made the filling Italian (proscuitto, red pepper, spinach and mozzarella) and decided to bake the dough balls instead of frying them. That said I liked the end result - it was almost like having filled gnocchi!
Ceviche de Pescado (Fish Ceviche)
Serves 6 as a “starter” or lunch portion. Serves 3 as a dinner.
Ingredients
1 lbs. Tilipia (or another firm white fish. Sashimi grade is ideal but I used fresh, never frozen, tilapia with the furthest available sell by date and am still alive.)
1 Garlic Clove, mashed
1/2 Jalepeno Pepper, minced
1 Grapefruit (supremed for the fruit and the squeezed for the juice)
1/2 cup Lime Juice, freshly squeezed (approximately 3 limes)
1/4 cup Grapefruit Juice, freshly squeezed
1 tablespoon Cilantro, finely chopped
1/2 Red Onion, thinly sliced lengthwise into half moons
Salt and Pepper (to taste)
Directions:
1. Slice the fish into pieces between 1/2 inch and 2 inches depending on your preference. Place the fish in a non-reactive, shallow plan in a thin layer. Season with salt and pepper.
2. Supreme the grapefruit into the dish with the fish.
3. Combine the grapefruit and lime juice, jalepeno, cilantro and garlic. Pour mixture over fish and grapefruit. Stir lightly to expose all the fish to some of the citrus juice mixture.
4. Put sliced onion on top of fish as it “cooks."
5. Let fish stand for 10 minutes or longer depending on your preference.
Not Papas Rellenas
Makes 8
Ingredients
For the dough:
2 1/4 pounds Russet Potatoes
1 large Egg
For the filling:
1 tablespoon Olive Oil
3/4 cup Proscuitto, cubed
1 1/2 cups Spinach, if mature remove the stalks
1 Red Bell Pepper, diced
3/4 cup Mozzarella, cubed
Salt and Pepper to taste
For the final preparation:
1 large Egg, beaten
1 cup All-Purpose Flour
Dash Salt
1 cup Panko Bread Crumbs
Directions:
In order to save time, you can prep the potatoes, and while they are cooling, make the filling. While the filling cools, make the potato “dough.” In this way, little time is spent waiting for anything to cool.
For the dough:
1. Pierce the potatoes with a fork, then place them in a bowl and cover with saran wrap. Heat in the microwave for approximately 8 minutes. Once they pierce easily with a fork, they are done.
2. Place on a plate and cut in half to speed cooling.
3. Peel the potatoes as soon as you can handle them and mash them with a potato masher or force them through a potato ricer (preferred).
4. Add egg, salt and pepper and knead “dough” thoroughly to ensure that ingredients are well combined and uniformly distributed.
For the filling:
1. Place 1 tablespoon of oil in a saute pan and heat over medium. Once hot add the proscuitto and brown it (about 5 minutes). Remove from the pan and place on a paper towel covered plate to drain.
2. Wipe out the pan leaving only a thin coating of oil. Add the red bell pepper and saute 3 minutes. Add the spinach and saute until it wilts.
3. Turn off the heat, add the mozzarella and proscuitto and toss to combine.
4. Allow filling to cool before forming “papas.”
Forming and baking the papas:
1. Preheat the oven to 350 degrees farenheit.
2. Use three small bowls to prepare the papas. In one, combine flour and salt. In the second, a beaten egg with a tiny bit of water. Put bread crumbs in the third.
3. Flour your hands and scoop up 1/8 of the total dough to make a round pancake with your hands. Make a slight indentation in the middle for the filling.
4. Spoon a generous amount of filling into the center and then roll the potato closed, forming a smooth, ball-like casing around the filling. Repeat with all dough.
5. Dip each papa in the three bowls to coat: first roll in flour, then dip in egg, then roll in bread crumbs.
6. Place papas on the baking sheet and spray the exterior with oil.
7. Bake the papas in the oven for 25-30 minutes, flipping once in the middle. Eat on them on their own, with spaghetti sauce or over salad.
In spite of later trips to Italy, Cyprus and Spain, South American food has stayed in my head. I just can't approximate it as well as the other cuisines. I still dream about the tangy, soup-like ceviche served with popcorn, the creamy, cheesy grilled corn (choclos not to be confused with cholos) available for a dollar on the street, cilantro rice, and fresh pina coladas. Needless to say when Kathlyn introduced this month's challenge by describing her love of South American food's flavor I was excited.
Kathlyn of Bake Like a Ninja was our Daring Cooks’ March 2011 hostess. Kathlyn challenged us to make two classic Peruvian dishes: Ceviche de Pescado from “Peruvian Cooking – Basic Recipes” by Annik Franco Barreau. And Papas Rellenas adapted from a home recipe by Kathlyn’s Spanish teacher, Mayra. You can find the full challenge background and recipes here; the recipes updated with my variations are below.
I've tried making ceviche before but this version turned out much better. It keeps things simple so the citrus cooked fish stays the main event (as it should). I incorporated pink grapefruit into the ceviche for some additional color and reduced the provided recipe by half but otherwise followed it. I'm delighted to say that my Mom's Venzuelan co-worker said it was perfect so congrats to Kathlyn for finding something authentic enough to please a South American.
As for the Papas Rellanas I really went off the reservation. While I read through the recipe and largely followed it, what I made couldn't really be called Papas Rellanas since I made the filling Italian (proscuitto, red pepper, spinach and mozzarella) and decided to bake the dough balls instead of frying them. That said I liked the end result - it was almost like having filled gnocchi!
Ceviche de Pescado (Fish Ceviche)
Serves 6 as a “starter” or lunch portion. Serves 3 as a dinner.
Ingredients
1 lbs. Tilipia (or another firm white fish. Sashimi grade is ideal but I used fresh, never frozen, tilapia with the furthest available sell by date and am still alive.)
1 Garlic Clove, mashed
1/2 Jalepeno Pepper, minced
1 Grapefruit (supremed for the fruit and the squeezed for the juice)
1/2 cup Lime Juice, freshly squeezed (approximately 3 limes)
1/4 cup Grapefruit Juice, freshly squeezed
1 tablespoon Cilantro, finely chopped
1/2 Red Onion, thinly sliced lengthwise into half moons
Salt and Pepper (to taste)
Directions:
1. Slice the fish into pieces between 1/2 inch and 2 inches depending on your preference. Place the fish in a non-reactive, shallow plan in a thin layer. Season with salt and pepper.
2. Supreme the grapefruit into the dish with the fish.
3. Combine the grapefruit and lime juice, jalepeno, cilantro and garlic. Pour mixture over fish and grapefruit. Stir lightly to expose all the fish to some of the citrus juice mixture.
4. Put sliced onion on top of fish as it “cooks."
5. Let fish stand for 10 minutes or longer depending on your preference.
Not Papas Rellenas
Makes 8
Ingredients
For the dough:
2 1/4 pounds Russet Potatoes
1 large Egg
For the filling:
1 tablespoon Olive Oil
3/4 cup Proscuitto, cubed
1 1/2 cups Spinach, if mature remove the stalks
1 Red Bell Pepper, diced
3/4 cup Mozzarella, cubed
Salt and Pepper to taste
For the final preparation:
1 large Egg, beaten
1 cup All-Purpose Flour
Dash Salt
1 cup Panko Bread Crumbs
Directions:
In order to save time, you can prep the potatoes, and while they are cooling, make the filling. While the filling cools, make the potato “dough.” In this way, little time is spent waiting for anything to cool.
For the dough:
1. Pierce the potatoes with a fork, then place them in a bowl and cover with saran wrap. Heat in the microwave for approximately 8 minutes. Once they pierce easily with a fork, they are done.
2. Place on a plate and cut in half to speed cooling.
3. Peel the potatoes as soon as you can handle them and mash them with a potato masher or force them through a potato ricer (preferred).
4. Add egg, salt and pepper and knead “dough” thoroughly to ensure that ingredients are well combined and uniformly distributed.
For the filling:
1. Place 1 tablespoon of oil in a saute pan and heat over medium. Once hot add the proscuitto and brown it (about 5 minutes). Remove from the pan and place on a paper towel covered plate to drain.
2. Wipe out the pan leaving only a thin coating of oil. Add the red bell pepper and saute 3 minutes. Add the spinach and saute until it wilts.
3. Turn off the heat, add the mozzarella and proscuitto and toss to combine.
4. Allow filling to cool before forming “papas.”
Forming and baking the papas:
1. Preheat the oven to 350 degrees farenheit.
2. Use three small bowls to prepare the papas. In one, combine flour and salt. In the second, a beaten egg with a tiny bit of water. Put bread crumbs in the third.
3. Flour your hands and scoop up 1/8 of the total dough to make a round pancake with your hands. Make a slight indentation in the middle for the filling.
4. Spoon a generous amount of filling into the center and then roll the potato closed, forming a smooth, ball-like casing around the filling. Repeat with all dough.
5. Dip each papa in the three bowls to coat: first roll in flour, then dip in egg, then roll in bread crumbs.
6. Place papas on the baking sheet and spray the exterior with oil.
7. Bake the papas in the oven for 25-30 minutes, flipping once in the middle. Eat on them on their own, with spaghetti sauce or over salad.
Monday, February 14, 2011
Hiyashi Soba and Tempura
First things first... Happy Valentine's Day! It may be manufactured holiday but I still enjoy it. There is nothing wrong with a reminder to say thank you and send "pink hearts" to those you love. Thank you to my friends, family and anyone who stumbles across this posts and reads it for your time and support. <3
The February 2011 Daring Cooks’ challenge was hosted by Lisa of Blueberry Girl. She challenged Daring Cooks to make Hiyashi Soba and Tempura. She has various sources for her challenge including japanesefood.about.com, pinkbites.com, and itsybitsyfoodies.com. You can find her detailed notes on preparing the challenge foods and the provided recipes here.
Hiyashi Soba is a popular Japanese noodle salad that is served only during the summer. It is a flexible recipe - you can eat soba noodles just with dipping sauce and call it a day or serve up lots of veggies on the side to mix with the noodles and sauce. While I have made soba noodle dishes before, this was my first cold recipe and it was a pleasant change of pace that will be revisited.
I served the soba noodles with julienned cucumber, shitake mushroom slices (zapped for 30 seconds in the microwave), grated daikon and the spicy dipping sauce from the recipe Lisa provided. I especially loved the sauce's zingy flavor with the lightness of the cucumbers on the soba. As she says and, as I've learned the hard way, the most important thing with soba noodles is making sure they don't overcook and become a gelatinous clump. The big plate is snow pea shoots and mustard greens sauteed with sesame and veggie oil and some ginger. I found them a bit bitter so I'm not going to elaborate.
Instead of using the provided tempora recipe, I used the one listed on the back of my panko bread crumbs. The resulting tempora had a nice, crunchy breading that I was surprised to enjoy as I'm not a big fan of fried food, outside of corn dogs and funnel cakes. I preferred the sweet potato and broccoli to the squash and the decorative Sriracha was a fun way to spice up these bits. I don't think I will make tempora again as I find the cost of oil for deep frying somewhat prohibitive but at least I no longer feel the need to shun it. Thanks for a fun challenge, Lisa!
Panko Tempura
Vegetable Oil
1 package Panko Breadcrumbs (you won't use them all)
2 Tbsp Flour
1 Egg
2 Tbsp Water
Pinch Salt
1 yellow squash, cut into 1/3" slices
1 small sweet potato, cut into 1/3" slices
1 cup broccoli florets, separated into small bunches if necessary
1. Heat oil in a large pan to 350 degrees Fahrenheit. You should have 2 inches of oil present.
2. Place a wire rack on a baking sheet with a sheet of newspaper on top. Cover the newspaper with paper towels.
2. Place panko breadcrumbs on a plate. Place 2 tablespoons of flour on a separate plate. Mix the egg with a pinch of salt and 2 tablespoons of water in a bowl.
3. Evenly coat each vegetable slice lightly with flour. Dip into egg mixture. Then dredge in the panko breadcrumbs.
4. Cook the breaded vegetables 4-5 at a time for about 2 minutes each until golden and crispy. Flip once or twice as they cook to get more even coloration.
5. Remove to the wire rack to let the oil drain. A long handled wire skimmer works well for this process as it lets excess oil drain off. It also is good for fishing out extra breading between batches.
The February 2011 Daring Cooks’ challenge was hosted by Lisa of Blueberry Girl. She challenged Daring Cooks to make Hiyashi Soba and Tempura. She has various sources for her challenge including japanesefood.about.com, pinkbites.com, and itsybitsyfoodies.com. You can find her detailed notes on preparing the challenge foods and the provided recipes here.
Hiyashi Soba is a popular Japanese noodle salad that is served only during the summer. It is a flexible recipe - you can eat soba noodles just with dipping sauce and call it a day or serve up lots of veggies on the side to mix with the noodles and sauce. While I have made soba noodle dishes before, this was my first cold recipe and it was a pleasant change of pace that will be revisited.
I served the soba noodles with julienned cucumber, shitake mushroom slices (zapped for 30 seconds in the microwave), grated daikon and the spicy dipping sauce from the recipe Lisa provided. I especially loved the sauce's zingy flavor with the lightness of the cucumbers on the soba. As she says and, as I've learned the hard way, the most important thing with soba noodles is making sure they don't overcook and become a gelatinous clump. The big plate is snow pea shoots and mustard greens sauteed with sesame and veggie oil and some ginger. I found them a bit bitter so I'm not going to elaborate.
Instead of using the provided tempora recipe, I used the one listed on the back of my panko bread crumbs. The resulting tempora had a nice, crunchy breading that I was surprised to enjoy as I'm not a big fan of fried food, outside of corn dogs and funnel cakes. I preferred the sweet potato and broccoli to the squash and the decorative Sriracha was a fun way to spice up these bits. I don't think I will make tempora again as I find the cost of oil for deep frying somewhat prohibitive but at least I no longer feel the need to shun it. Thanks for a fun challenge, Lisa!
Panko Tempura
Vegetable Oil
1 package Panko Breadcrumbs (you won't use them all)
2 Tbsp Flour
1 Egg
2 Tbsp Water
Pinch Salt
1 yellow squash, cut into 1/3" slices
1 small sweet potato, cut into 1/3" slices
1 cup broccoli florets, separated into small bunches if necessary
1. Heat oil in a large pan to 350 degrees Fahrenheit. You should have 2 inches of oil present.
2. Place a wire rack on a baking sheet with a sheet of newspaper on top. Cover the newspaper with paper towels.
2. Place panko breadcrumbs on a plate. Place 2 tablespoons of flour on a separate plate. Mix the egg with a pinch of salt and 2 tablespoons of water in a bowl.
3. Evenly coat each vegetable slice lightly with flour. Dip into egg mixture. Then dredge in the panko breadcrumbs.
4. Cook the breaded vegetables 4-5 at a time for about 2 minutes each until golden and crispy. Flip once or twice as they cook to get more even coloration.
5. Remove to the wire rack to let the oil drain. A long handled wire skimmer works well for this process as it lets excess oil drain off. It also is good for fishing out extra breading between batches.
Find more artists like The Romantics at Myspace Music
Friday, January 14, 2011
January 2011 Daring Cooks' Challenge: Confit and Cassoulet
Our January 2011 Challenge comes from Jenni of The Gingered Whisk and Lisa from Parsley, Sage, Desserts and Line Drives. They have challenged the Daring Cooks to learn how to make a confit and use it within the traditional French dish of Cassoulet. They have chosen a traditional recipe from Anthony Bourdain and Michael Ruhlman. You can get the full scoop on their challenge and all the related recipes here.
Since I tackled this project on Wednesday night with Friday as the deadline, I made the Garlic Confit and Vegetarian/Vegan Cassoulet. As I type this out I realize I didn't 100% complete the challenge as I just have been eating the garlic confit on the side (of everything) rather than incorporating it but that is close enough for me. Hopefully our wise hostesses will forgive me for this oversight! This was a great challenge and I'm glad I followed through with completing it.
I see this cassoulet appearing again in my winter dining; it is very hearty and the aroma alone tells you something good is on its way. I found it more filling than similar chicken and vegetable soups, which the ingredient list and flavor profile was reminiscent of in spite of missing meat. I used canned beans and some aging, ailing whole wheat pitas to make the crumb topping, which while nice won't be essential for my dining pleasure in the future. It seemed like a lot of fuss for a marginal amount of added flavor and texture to me.
As for the Garlic Confit, if you have the patience to peel lots of garlic cloves, or are willing to pay for the pre-peeled variety, and have an hour or so you can make it. To summarize, you poach garlic cloves in oil with some spices, which results in garlic infused oil you can use on its own and smooth, creamy garlic bulbs that are decadent smeared on bread, on their own and, I assume, in other things. This elegant looking blog has a shortcut for peeling cloves, so I might try that if/when I make this again to cut down on the time involved and the sticky fingers. Or I might just stick to roasting garlic since it is less fussy.
Vegetarian/Vegan Cassoulet
Adapted slighty from Gourmet Magazine, March 2008
3 medium Leeks (white and pale green parts only)
4 medium Carrots, halved lengthwise and cut into 1-inch-wide pieces
3 Celery Ribs, cut into 1-inch-wide pieces
4 Garlic Cloves, chopped
1/4 cup Olive Oil
4 Fresh Thyme Sprigs
2 Fresh Parsley Sprigs
1 Turkish or 1/2 California Bay Leaf
1/8 tsp Ground Cloves
3 cans Cannellini or Great Northern beans, rinsed and drained
4 cups Water
4 cups Coarse Fresh Bread Crumbs from a Baguette (I used whole wheat pitas.)
1/3 cup Olive Oil
1 tablespoon Chopped Garlic
1/4 cup Chopped Parsley
1. Halve leeks lengthwise and cut crosswise into 1/2-inch pieces, then wash well and pat dry.
2. Cook leeks, carrots, celery, and garlic in oil with herb sprigs, bay leaf, cloves, and 1/2 teaspoon each of salt and pepper in a large heavy pot over medium heat, stirring occasionally, until softened and golden, about 15 minutes. Stir in beans, then water, and simmer, partially covered, stirring occasionally, until carrots are tender but not falling apart, about 30 minutes.
3. Preheat oven to moderate 350 degrees Fahrenheit with rack in middle.
4. Toss bread crumbs with oil, garlic, and 1/4 teaspoon each of salt and pepper in a bowl until well coated.
5. Spread in a baking pan and toast in oven, stirring once halfway through, until crisp and golden, 12 to 15 minutes.
6. Cool crumbs in pan, then return to bowl and stir in parsley.
7. Discard herb sprigs and bay leaf. Mash some of beans in pot with a potato masher or back of a spoon to thicken broth.
8. Season with salt and pepper. Just before serving, sprinkle with garlic crumbs.
Garlic Confit Adapted slighty from Saveur, Issue #129
Yields approximately 1 cup
3/4 cup Olive Oil
3/4 tsp Kosher Salt (Note: use half this amount if using table salt)
5 Whole Black Peppercorns
2-3 Fresh Thyme Sprigs
32 Garlic Cloves, peeled (about 3/4 cup)
1/2 Dried Bay Leaf
1. Preheat oven to 300 degrees Fahrenheit. Place ingredients in a 1/2 quart pot fully submerging the garlic in the oil. Cover pot. Bake until garlic is golden brown and tender, about 1 hour. Let cool.
2. Transfer mixture to a glass jar; cover surface of oil with plastic wrap and then close the jar. This can be refrigerated for up to 2 weeks.
Since I tackled this project on Wednesday night with Friday as the deadline, I made the Garlic Confit and Vegetarian/Vegan Cassoulet. As I type this out I realize I didn't 100% complete the challenge as I just have been eating the garlic confit on the side (of everything) rather than incorporating it but that is close enough for me. Hopefully our wise hostesses will forgive me for this oversight! This was a great challenge and I'm glad I followed through with completing it.
I see this cassoulet appearing again in my winter dining; it is very hearty and the aroma alone tells you something good is on its way. I found it more filling than similar chicken and vegetable soups, which the ingredient list and flavor profile was reminiscent of in spite of missing meat. I used canned beans and some aging, ailing whole wheat pitas to make the crumb topping, which while nice won't be essential for my dining pleasure in the future. It seemed like a lot of fuss for a marginal amount of added flavor and texture to me.
As for the Garlic Confit, if you have the patience to peel lots of garlic cloves, or are willing to pay for the pre-peeled variety, and have an hour or so you can make it. To summarize, you poach garlic cloves in oil with some spices, which results in garlic infused oil you can use on its own and smooth, creamy garlic bulbs that are decadent smeared on bread, on their own and, I assume, in other things. This elegant looking blog has a shortcut for peeling cloves, so I might try that if/when I make this again to cut down on the time involved and the sticky fingers. Or I might just stick to roasting garlic since it is less fussy.
Vegetarian/Vegan Cassoulet
Adapted slighty from Gourmet Magazine, March 2008
3 medium Leeks (white and pale green parts only)
4 medium Carrots, halved lengthwise and cut into 1-inch-wide pieces
3 Celery Ribs, cut into 1-inch-wide pieces
4 Garlic Cloves, chopped
1/4 cup Olive Oil
4 Fresh Thyme Sprigs
2 Fresh Parsley Sprigs
1 Turkish or 1/2 California Bay Leaf
1/8 tsp Ground Cloves
3 cans Cannellini or Great Northern beans, rinsed and drained
4 cups Water
4 cups Coarse Fresh Bread Crumbs from a Baguette (I used whole wheat pitas.)
1/3 cup Olive Oil
1 tablespoon Chopped Garlic
1/4 cup Chopped Parsley
1. Halve leeks lengthwise and cut crosswise into 1/2-inch pieces, then wash well and pat dry.
2. Cook leeks, carrots, celery, and garlic in oil with herb sprigs, bay leaf, cloves, and 1/2 teaspoon each of salt and pepper in a large heavy pot over medium heat, stirring occasionally, until softened and golden, about 15 minutes. Stir in beans, then water, and simmer, partially covered, stirring occasionally, until carrots are tender but not falling apart, about 30 minutes.
3. Preheat oven to moderate 350 degrees Fahrenheit with rack in middle.
4. Toss bread crumbs with oil, garlic, and 1/4 teaspoon each of salt and pepper in a bowl until well coated.
5. Spread in a baking pan and toast in oven, stirring once halfway through, until crisp and golden, 12 to 15 minutes.
6. Cool crumbs in pan, then return to bowl and stir in parsley.
7. Discard herb sprigs and bay leaf. Mash some of beans in pot with a potato masher or back of a spoon to thicken broth.
8. Season with salt and pepper. Just before serving, sprinkle with garlic crumbs.
Garlic Confit Adapted slighty from Saveur, Issue #129
Yields approximately 1 cup
3/4 cup Olive Oil
3/4 tsp Kosher Salt (Note: use half this amount if using table salt)
5 Whole Black Peppercorns
2-3 Fresh Thyme Sprigs
32 Garlic Cloves, peeled (about 3/4 cup)
1/2 Dried Bay Leaf
1. Preheat oven to 300 degrees Fahrenheit. Place ingredients in a 1/2 quart pot fully submerging the garlic in the oil. Cover pot. Bake until garlic is golden brown and tender, about 1 hour. Let cool.
2. Transfer mixture to a glass jar; cover surface of oil with plastic wrap and then close the jar. This can be refrigerated for up to 2 weeks.
If you think the confit looks creepy here wait until you refrigerate it and the oil coagulates.
Thank goodness it smooths back out quickly at room temperature and tastes better than it looks.
Tuesday, November 23, 2010
Avocado-Cilantro Soufflé and Pepper Jicama Salad with Lime-Cumin Vinaigrette
Dave and Linda from Monkeyshines in the Kitchen chose Soufflés as our November 2010 Daring Cooks’ Challenge! Dave and Linda provided two of their own delicious recipes plus a sinfully decadent chocolate soufflé recipe adapted from Gordon Ramsay’s recipe found at the BBC Good Food website. You can find their recipes and tips here. You can find Audax's always amazing additional tips and results here.
This month I was not only late but I also was very daring. I reviewed the provided recipes and those in my Fine Cooking I binder, then I created an Avocado-Cilantro Soufflé. I'll walk you through the steps I took but I can't say I would recommend that you try it since it's flavor improved as it cooled and soufflés are meant to be served HOT! If you do try it, add salt to the avocado mixture and keep an eye on it to ensure it doesn't overcook. Mine rose beautifully only to collapse after I overcooked it...at least the internal texture was right nevermind the rest of it.
I served the Avocado-Cilantro Soufflé with Sweet Potato Fries, a simple Pepper Jicama Salad with Lime-Cumin Vinaigrette (that you should make) and some Foreman'ed Pork Chops (courtesy of an assist from my Mom when I ran out of steam) topped with Caramelized Onions. Being home for Thanksgiving and having Mom's Kitchen-Aid mixer and dishwasher made this whole process so much easier!
Thanks to her, Dad and Jarrett for being so patient while I put our meal together and for bearing with the experimental soufflé.
Avocado-Cilantro Soufflé
(enough for a 1.5 quart dish; serves 4 people)
1 Tbsp. Butter
Crushed Doritos
1 Haas Avocado
1/4 cup Cilantro, chopped
2 Tbsp. Coconut Milk (Regular Milk or Cream would be fine)
1 Tbsp. Butter
1/8 cup cheddar cheese
4 egg yolks, at room temperature
8 egg whites, at room temperature
1. Melt 1 tablespoon of butter in oven-proof dish with high sides. Coat the interior of the dish with the butter, then coat it with the crushed Doritos.
2. Preheat the oven to 350 degrees.
3. Halve the avocado, remove its pit and scoop the flesh into food processor. Rinse and dry the cilantro, pluck off the leaves and chop enough to add 1/4 cup cilantro to avocado. Add 2 tablespoons of coconut milk to the food processor to facilitate pureeing. Puree the mixture until smooth.
4. Melt the other tablespoon of butter into a pan on the stove. Transfer avocado-cilantro mixture to the pan, add the grated cheddar and warm the mixture incorporating the cheddar. Remove from heat and cool slightly.
5. Temper the 4 egg yolks with a little of the avocado mixture, then incorporate them into the avocado-cilantro mixture. Transfer to a medium bowl.
6. Beat the egg whites to soft peak stage and fold them into the avocado-cilantro mixture. Be careful not to overmix and deflate the egg whites.
7. Transfer the mixture into oven-proof dish, wipe the edges clean and smooth the top. Bake until puffy, serve immediately. 40 minutes was way too long of a baking time; maybe try 22 minutes as that is when my souffle was elevated and starting to turn golden.
Pepper Jicama Salad with Lime-Cumin Vinaigrette
(an approximate recipe to serve 4-6 people)
5 Ounces of Baby Spinach
1.5 Red, Orange and/or Yellow Peppers
1 Medium Jicama
1 Lime, juice only
1.5 Tbsp. Canola Oil
1 Tsp. Cumin
.5 Tbsp. Agave Nectar
Salt and Pepper
1. Retrieve a large bowl. Place the spinach in the bowl.
2. Wash the peppers and cut them into small dice. Place the the diced pepper in the bowl with the spinach.
3. Peel the jicama using your knife. Cut it into small cubes. Add these cubes to the bowl.
4. Juice the lime into a jar with a lid. Add the canola oil, cumin, agave nectar and salt and pepper to taste. Shake vigorously. It should still be slightly tart in my opinion for a bright contrast to the jicama and pepper's sweetness.
5. Pour over the salad and serve.
This month I was not only late but I also was very daring. I reviewed the provided recipes and those in my Fine Cooking I binder, then I created an Avocado-Cilantro Soufflé. I'll walk you through the steps I took but I can't say I would recommend that you try it since it's flavor improved as it cooled and soufflés are meant to be served HOT! If you do try it, add salt to the avocado mixture and keep an eye on it to ensure it doesn't overcook. Mine rose beautifully only to collapse after I overcooked it...at least the internal texture was right nevermind the rest of it.
I served the Avocado-Cilantro Soufflé with Sweet Potato Fries, a simple Pepper Jicama Salad with Lime-Cumin Vinaigrette (that you should make) and some Foreman'ed Pork Chops (courtesy of an assist from my Mom when I ran out of steam) topped with Caramelized Onions. Being home for Thanksgiving and having Mom's Kitchen-Aid mixer and dishwasher made this whole process so much easier!
Thanks to her, Dad and Jarrett for being so patient while I put our meal together and for bearing with the experimental soufflé.
Avocado-Cilantro Soufflé
(enough for a 1.5 quart dish; serves 4 people)
1 Tbsp. Butter
Crushed Doritos
1 Haas Avocado
1/4 cup Cilantro, chopped
2 Tbsp. Coconut Milk (Regular Milk or Cream would be fine)
1 Tbsp. Butter
1/8 cup cheddar cheese
4 egg yolks, at room temperature
8 egg whites, at room temperature
1. Melt 1 tablespoon of butter in oven-proof dish with high sides. Coat the interior of the dish with the butter, then coat it with the crushed Doritos.
2. Preheat the oven to 350 degrees.
3. Halve the avocado, remove its pit and scoop the flesh into food processor. Rinse and dry the cilantro, pluck off the leaves and chop enough to add 1/4 cup cilantro to avocado. Add 2 tablespoons of coconut milk to the food processor to facilitate pureeing. Puree the mixture until smooth.
4. Melt the other tablespoon of butter into a pan on the stove. Transfer avocado-cilantro mixture to the pan, add the grated cheddar and warm the mixture incorporating the cheddar. Remove from heat and cool slightly.
5. Temper the 4 egg yolks with a little of the avocado mixture, then incorporate them into the avocado-cilantro mixture. Transfer to a medium bowl.
6. Beat the egg whites to soft peak stage and fold them into the avocado-cilantro mixture. Be careful not to overmix and deflate the egg whites.
7. Transfer the mixture into oven-proof dish, wipe the edges clean and smooth the top. Bake until puffy, serve immediately. 40 minutes was way too long of a baking time; maybe try 22 minutes as that is when my souffle was elevated and starting to turn golden.
Pepper Jicama Salad with Lime-Cumin Vinaigrette
(an approximate recipe to serve 4-6 people)
5 Ounces of Baby Spinach
1.5 Red, Orange and/or Yellow Peppers
1 Medium Jicama
1 Lime, juice only
1.5 Tbsp. Canola Oil
1 Tsp. Cumin
.5 Tbsp. Agave Nectar
Salt and Pepper
1. Retrieve a large bowl. Place the spinach in the bowl.
2. Wash the peppers and cut them into small dice. Place the the diced pepper in the bowl with the spinach.
3. Peel the jicama using your knife. Cut it into small cubes. Add these cubes to the bowl.
4. Juice the lime into a jar with a lid. Add the canola oil, cumin, agave nectar and salt and pepper to taste. Shake vigorously. It should still be slightly tart in my opinion for a bright contrast to the jicama and pepper's sweetness.
5. Pour over the salad and serve.
Tuesday, September 14, 2010
September 2010 Daring Cooks' Challenge: Applebutter Canned!
The September 2010 Daring Cooks’ challenge was hosted by John of Eat4Fun. John chose to challenge The Daring Cooks to learn about food preservation, mainly in the form of canning and freezing. He challenged everyone to make a recipe and preserve it. John’s source for food preservation information was from The National Center for Home Food Preservation.
This challenge was very intimidating! Canning has been an idea that interests me but also one I've found a reason to avoid. John's challenge left me with no excuse but to face my fear and his meticulous instructions must have left no room for error because I'm the proud owner of a pint of canned apple butter.
My biggest struggle was how to extract the canned applebutter, keeping it level, from my stockpot after the boiling and cooling... I'm very lucky it sealed as I dropped it on its side several times back in the water before realizing I needed to carefully use both the tongs and the spatula, which barely worked. Water creates a lot of drag. Any tips on how to get canned goods out of the water?
In retrospect, I should have purchased two 3 pound bags of apples if I was going to go through the whole process but even having one successfully canned item is exciting. Nevermind that I never want to open the jar as staring at it makes me so happy. Fortunately, I saved the other half of the applebutter and am enjoying it homemade baguette slices, plain yogurt and/or by the spoonful. It's a delicious, cinnamon spiced fruit spread that is perfect for Fall without any added sugar. Even if you don't want to can it, you should make some applebutter to celebrate the new season.
This challenge was very intimidating! Canning has been an idea that interests me but also one I've found a reason to avoid. John's challenge left me with no excuse but to face my fear and his meticulous instructions must have left no room for error because I'm the proud owner of a pint of canned apple butter.
My biggest struggle was how to extract the canned applebutter, keeping it level, from my stockpot after the boiling and cooling... I'm very lucky it sealed as I dropped it on its side several times back in the water before realizing I needed to carefully use both the tongs and the spatula, which barely worked. Water creates a lot of drag. Any tips on how to get canned goods out of the water?
In retrospect, I should have purchased two 3 pound bags of apples if I was going to go through the whole process but even having one successfully canned item is exciting. Nevermind that I never want to open the jar as staring at it makes me so happy. Fortunately, I saved the other half of the applebutter and am enjoying it homemade baguette slices, plain yogurt and/or by the spoonful. It's a delicious, cinnamon spiced fruit spread that is perfect for Fall without any added sugar. Even if you don't want to can it, you should make some applebutter to celebrate the new season.
Saturday, August 14, 2010
Homemade Pierogi's
Seeing how I'm due to fly out from JFK in, oh, less than six hours this will be the shortest Daring Cooks write-up to date. This month's challenge was versatile, affordable and tasty -- my favorite traits in a challenge. Thank you to Liz and Anula for hosting it. Now for the required text - the August 2010 Daring Cooks’ Challenge was hosted by LizG of Bits n’ Bites and Anula of Anula’s Kitchen. They chose to challenge Daring Cooks to make pierogi from scratch and an optional challenge to provide one filling that best represents their locale.
My pierogi's won't win any beauty contests but they were delicious, especially when browned in olive oil for added flavor. They take some time to make but are well worth the effort. In the future I'm going to skip "simple" wonton ravioli's and make peroigi dough instead as it doesn't waste my time with egg wash or create a disasterous explosion of insides when you skip the said egg wash. Not that I've done that.
I chose to follow the Russian Style Pierogi dough recipe provided, free forming them by hand and filling them with the Heidi at 101 Cookbooks' fresh, light and lemony Plump Pea Dumpling filling. When my pierogi's wouldn't accept more than a half teaspoon of filling I made up for it by heating a bit of cream and adding the filling to it to create a simple sauce. On the side I mixed corn cut fresh off the cob, minced dill and lemon juice for a simple salad.
It was a great summer dish that reheated splendidly for work. If you don't like dill, don't mingle the pierogis with the simple salad as the dill takes over. Personally I liked the mingling as it added texture to the overall dish and an additional kick of flavor.
By the way, I'm experiencing the great outdoors in Big Sky Country i.e. Montana and Canada 8/13 to 8/24, so any responses will come when I return. Thank you for your patience and wish me luck seeing a moose with a rack.
My pierogi's won't win any beauty contests but they were delicious, especially when browned in olive oil for added flavor. They take some time to make but are well worth the effort. In the future I'm going to skip "simple" wonton ravioli's and make peroigi dough instead as it doesn't waste my time with egg wash or create a disasterous explosion of insides when you skip the said egg wash. Not that I've done that.
I chose to follow the Russian Style Pierogi dough recipe provided, free forming them by hand and filling them with the Heidi at 101 Cookbooks' fresh, light and lemony Plump Pea Dumpling filling. When my pierogi's wouldn't accept more than a half teaspoon of filling I made up for it by heating a bit of cream and adding the filling to it to create a simple sauce. On the side I mixed corn cut fresh off the cob, minced dill and lemon juice for a simple salad.
It was a great summer dish that reheated splendidly for work. If you don't like dill, don't mingle the pierogis with the simple salad as the dill takes over. Personally I liked the mingling as it added texture to the overall dish and an additional kick of flavor.
By the way, I'm experiencing the great outdoors in Big Sky Country i.e. Montana and Canada 8/13 to 8/24, so any responses will come when I return. Thank you for your patience and wish me luck seeing a moose with a rack.
Wednesday, July 14, 2010
Experiments with Nut Butter
The July 2010 Daring Cooks’ Challenge was hosted by Margie of More Please and Natashya of Living in the Kitchen with Puppies. They chose to challenge Daring Cooks to make their own nut butter from scratch, and use the nut butter in a recipe. Their sources include Better with Nut Butter by Cooking Light Magazine, Asian Noodles by Nina Simonds, and Food Network online. This was a unique and affordable challenge - two traits I always appreciate. Thank you Margie and Natashya for hostessing.
The required challenge specifically was to use nut butter in a savory preparation and the optional challenge was to use it in a sweet preparation. Having skipped all last month's challenges and moved relatively close to the amazing Sahadi's I decided to go all out and do something savory and something sweet.
Per their extensive research "making nut butter is a simple process of pouring nuts in the food processor and grinding them until they become a paste or butter.The total time required depends on the fat and moisture content of the nuts; grinding time will vary from roughly 1 to 4 minutes (assuming a starting volume of 1 to 2 cups nuts). The yield of nut butter is about half the original volume of nuts."
These instructions are probably true if you have a full size, high powered food processor but in my mini-prep processor getting to the Play-Doh stage was an act of sheer will that took much longer than 1 to 5 minutes. My cashew butter and pistachio butter both were halted at this stage as the machine was overheating. The results still were tasty but until I have a high powered processing device I plan to continue buying my nut butter rather than making it.
I made a variation on the provided Asian Noodle Salad with Cashew Dressing recipe for my savory dish. I halved the amount of cashew dressing (I want to eat the rest of the cashew dough by itself!), skipped the red bell pepper, substituted soba noodles and added a bag of broccoli slaw from Trader Joe's and 3/4 cup of julienned carrots. The resulting salad was rich and was incredibly filling.
I loved the crunch of all the veggies in contrast to the soba noodles and shrimp's smoothness but the highlight is the thick dressing with its creamy, sharp flavor. Between it and the onions this is definitely a dish you'll want to brush your teeth after eating! That said I'm sure I'll make it again. It will be a quick meal to put together with pre-prepared nut butter. This recipe and the full challenge instructions can be found here.
My dessert was Pistachio Oatmeal Lace Cookie Towers with Honey Macerated Cherries. I alternated Katy at Sugarlaw's Oatmeal Lace Cookies and a Pistachio Nut Cream (made by mixing greek yogurt and the pistachio butter to taste) to create the towers and served cherries macerated in buckwheat honey on top and to the side. Katy's cookies are nutty, chewy, crispy and are the real star of the dessert. They are delicious on their own but the unsweetened filling is a pleasant contrast to the quite sweet cookies.
My only substitution to her recipe was using dark corn syrup as I had it on hand. Be sure to use parchment paper so they don't stick to the pan and watch the time as they brown quickly. Don't assemble this in advance the cookies disintegrate losing their pleasant contrast to an otherwise soft dessert. I'd be happy to eat this again too. Yum.
The required challenge specifically was to use nut butter in a savory preparation and the optional challenge was to use it in a sweet preparation. Having skipped all last month's challenges and moved relatively close to the amazing Sahadi's I decided to go all out and do something savory and something sweet.
Per their extensive research "making nut butter is a simple process of pouring nuts in the food processor and grinding them until they become a paste or butter.The total time required depends on the fat and moisture content of the nuts; grinding time will vary from roughly 1 to 4 minutes (assuming a starting volume of 1 to 2 cups nuts). The yield of nut butter is about half the original volume of nuts."
These instructions are probably true if you have a full size, high powered food processor but in my mini-prep processor getting to the Play-Doh stage was an act of sheer will that took much longer than 1 to 5 minutes. My cashew butter and pistachio butter both were halted at this stage as the machine was overheating. The results still were tasty but until I have a high powered processing device I plan to continue buying my nut butter rather than making it.
I made a variation on the provided Asian Noodle Salad with Cashew Dressing recipe for my savory dish. I halved the amount of cashew dressing (I want to eat the rest of the cashew dough by itself!), skipped the red bell pepper, substituted soba noodles and added a bag of broccoli slaw from Trader Joe's and 3/4 cup of julienned carrots. The resulting salad was rich and was incredibly filling.
I loved the crunch of all the veggies in contrast to the soba noodles and shrimp's smoothness but the highlight is the thick dressing with its creamy, sharp flavor. Between it and the onions this is definitely a dish you'll want to brush your teeth after eating! That said I'm sure I'll make it again. It will be a quick meal to put together with pre-prepared nut butter. This recipe and the full challenge instructions can be found here.
My dessert was Pistachio Oatmeal Lace Cookie Towers with Honey Macerated Cherries. I alternated Katy at Sugarlaw's Oatmeal Lace Cookies and a Pistachio Nut Cream (made by mixing greek yogurt and the pistachio butter to taste) to create the towers and served cherries macerated in buckwheat honey on top and to the side. Katy's cookies are nutty, chewy, crispy and are the real star of the dessert. They are delicious on their own but the unsweetened filling is a pleasant contrast to the quite sweet cookies.
My only substitution to her recipe was using dark corn syrup as I had it on hand. Be sure to use parchment paper so they don't stick to the pan and watch the time as they brown quickly. Don't assemble this in advance the cookies disintegrate losing their pleasant contrast to an otherwise soft dessert. I'd be happy to eat this again too. Yum.
It looks similar to kiwi sorbet!
Gorgeous!
Friday, May 14, 2010
Stacked Green Chile & Grilled Chicken Enchiladas and Chili Coconut Lime Mango "Salad"
Our hosts for this month for the Daring Cooks Challenge, Barbara of Barbara Bakes and Bunnee of Anna+Food have chosen a delicious Stacked Green Chile & Grilled Chicken Enchilada recipe in celebration of Cinco de Mayo! The recipe, featuring a homemade enchilada sauce was found on www.finecooking.com and written by Robb Walsh.
The Chili Coconut Lime Mango "Salad" I threw together for the side on the other hand I hope to eat all the time! It was super easy and I really liked the coconut's crunch, lime's tanginess, chili powder's earthiness alongside the sweet mango. It may have been a bit much orange on the plate in combination with the cheese topped enchiladas but it was worth it.
This challenge was the first time I had seen stacked enchiladas and the presentation really appealed to me, so I was excited even though I NEVER order enchiladas. I'm more of a guacuamole salad, tostada, fajita, quesadilla or beans and rice girl (not all of that at once though I swear).
I planned ahead to serve these on Cinco de Mayo and did the work over several days, which was great as making your own enchilada sauce is time consuming. Roasting and peeling the peppers was the hardest part (after tracking them and the tomatillos down in Chelsea Market's Manhattan Fruit Exchange); it required a lot of patience and more time than the rest of the sauce's preparation. My hands were tingly the next day after handling the peppers so long, which amused me and reminded me of the hard work I had done.
I followed the recipe pretty exactly making only two changes: I skipped the homemade tortillas (though I hope to make them soon) and improvised on the grilled chicken by sauteing on the stove top to caramelize some flavor into it and then put the breasts in the oven to finish. The resulting stacks were very filling, savory and spicy. They even reheated fairly well.
I'm pleased to say the challenge fully met my expectations, although I could have been less timid with the sauce's salt and less aggressive with its reduction. I loved how fresh and spicy the sauce was...completely worth the tingles and time. I'd make it again if there were a request and/or occasion. The work makes this not an every day recipe for me.
The Chili Coconut Lime Mango "Salad" I threw together for the side on the other hand I hope to eat all the time! It was super easy and I really liked the coconut's crunch, lime's tanginess, chili powder's earthiness alongside the sweet mango. It may have been a bit much orange on the plate in combination with the cheese topped enchiladas but it was worth it.
Chili Coconut Lime Mango "Salad"
Serves 4
6 Mangoes, Cubed* (approximately 4 cups)
Juice of 1 Small Lime
1 Tsp. Chili Powder
2 Tbsp. Coconut, Unsweetened (I had this kind from Whole Foods)
1 Tsp. Agave Nectar**
Directions
Cube mangoes and place in a medium bowl. Juice/squeeze the lime over mangos and toss to coat them. Measure and add the additional ingredients. Toss again to combine the flavors and serve.
* I used baby mango so I likely needed more than you would with regular ones.
**My mangoes weren't the ripest so I added this. It probably wouldn't be necessary with ones in perfect condition.
Sunday, March 14, 2010
Lemon-Kissed White Bean and Kale Risotto
33 minutes left to post this Daring Cooks' Challenge before the deadline! Between 1 p.m. and now I have burnt my fingers making cookies, cut my hand on a can, "run" 4 miles in 45 minutes at the gym (furthest ever), freaked out about the apartment beside ours in the building next door catching on fire and made this risotto. So I'm a bit tired. We'll see if I can string together coherent thoughts. If not just act like I did please...
The 2010 March Daring Cooks challenge was hosted by Eleanor of MelbournefoodGeek and Jess of Jessthebaker. They chose to challenge Daring Cooks to make risotto. The various components of their challenge recipe are based on input from the Australian Masterchef cookbook and the cookbook Moorish by Greg Malouf. The recipes can be downloaded here. In addition to making risotto all Daring Cooks were to make their own stock.
Since I'm not eating meat this month I made roasted vegetable stock, which I had not made previously. The recipe creates a very rich, dark stock though I'm not sure the time involved is worth the flavor. It was my first time successfully keeping a stock at a simmer so it was a very clear stock, even if it was almost black, and that was exciting.
I liked the Eleanor and Jess' chosen risotto recipe. It was much simpler than the version I have used in the past and still creates a warm, comforting risotto. This time I added a bunch of Swiss Chard cut into ribbons, the zest of a Lemon, a tablespoon of Lemon Juice, a half cup of grated Parmigiano-Reggiano and Salt and Pepper to taste to create a nutritious main course. I liked the end result! The lemon kept things bright and the swiss chard broke up the creaminess of the risotto and beans. In the future I would probably try to make the lemon flavor more intense as there was only a hint of it.
Thanks to Eleanor and Jess for hosting a great, affordable challenge!
The 2010 March Daring Cooks challenge was hosted by Eleanor of MelbournefoodGeek and Jess of Jessthebaker. They chose to challenge Daring Cooks to make risotto. The various components of their challenge recipe are based on input from the Australian Masterchef cookbook and the cookbook Moorish by Greg Malouf. The recipes can be downloaded here. In addition to making risotto all Daring Cooks were to make their own stock.
Since I'm not eating meat this month I made roasted vegetable stock, which I had not made previously. The recipe creates a very rich, dark stock though I'm not sure the time involved is worth the flavor. It was my first time successfully keeping a stock at a simmer so it was a very clear stock, even if it was almost black, and that was exciting.
I liked the Eleanor and Jess' chosen risotto recipe. It was much simpler than the version I have used in the past and still creates a warm, comforting risotto. This time I added a bunch of Swiss Chard cut into ribbons, the zest of a Lemon, a tablespoon of Lemon Juice, a half cup of grated Parmigiano-Reggiano and Salt and Pepper to taste to create a nutritious main course. I liked the end result! The lemon kept things bright and the swiss chard broke up the creaminess of the risotto and beans. In the future I would probably try to make the lemon flavor more intense as there was only a hint of it.
Thanks to Eleanor and Jess for hosting a great, affordable challenge!
Sunday, February 14, 2010
Mezze with Homemade Pita, Hummus and More
Happy Valentine's Day! ♥
The 2010 February Daring Bakers challenge was hosted by Michele of Veggie Num Nums. Michele chose to challenge everyone to make mezze based on various recipes from Claudia Roden, Jeffrey Alford and Naomi Dugid. You can download a PDF with the challenge details and other helpful information here. Michele really did her research and provided lots of optional recipes in addition to the required homemade pita and hummus. Thanks so much for your hard work, Michele!
This challenge was nice as you could do the minimum or get really creative and it could be done in advance for leisurely entertaining. Of course, I didn't plan correctly and there was nothing leisurely about my experience. I started at 4 p.m. Saturday before last and didn't finish until 8:30 p.m. I mean why would I want to spread the work out over several days when I could exhaust myself cramming it into one action packed night? :) Thank goodness Jeff allowed me to change plans and came to me. I'm not sure what I would have done with all the food without him. 16 pitas for one girl?! Even with his help, I was able to take leftovers to a Superbowl party Sunday, eat them all week and STILL have 3 pitas left as of tonight (2/13).
My pitas were mostly pocket-less. Those with pockets were significantly lighter and more enjoyable, even though the others still tasted good. I'm not sure why so few puffed. I used the same methodology throughout but it must be some technicality. I will definitely try pitas again with a quarter or half of the recipe. I have a feeling getting the pitas to puff takes practice. Do any other Daring Cooks have tips? If so, please share them!
As for the hummus, it was a bit raw for my taste between all the lemon juice and the garlic's bite. The hummus also needed more extra liquid than in past recipes. I love making my own hummus but I'll probably stick to the basic recipe I have scrawled in a notebook somewhere in my room or this AMAZING cilantro-lime hummus.
The provided Cucumber Raita recipe was enjoyable; I always had wondered what went into it. I'm certain I'll revisit it perhaps amping up the cumin since I love it so much. Cumin is about to be my first non-baking related spice to have ever used up, which seems like a milestone in the kitchen.
I also served cubed feta, a simple salad with roasted beets and a pearl barley salad loosely inspired by this complicated and wonderful Eggplant Barley Salad. The roasted beets were very fresh and bright with the zest of one lemon, juice of half a lemon and fresh parsley; I thought of this simple recipe when I threw them together. For the pearl barley salad, totally trying to remember now as I was lazy and didn't outline promptly, I cooked the pearl barley and set it aside to cool. While it was cooling, I sauteed ground lamb in water, then set it aside to drain. Next I added onions, cumin and coriander to the same pan and sauteed until the onions were translucent. Finally I combined everything together with some freshly chopped parsley, quartered and seeded cherry tomatoes and, when I realized I omitted salt, some crumbled feta to compensate. It could use some work but it wasn't a bad variation and it took a LOT less time.
As for the three leftover pitas? They are so going in the freezer for the moment. Don't get me wrong. It was a great, tasty challenge but I have mezze fatigue. I'm certain I'll be back to them sooner rather than later though as they are fun to put together and make a healthy, portable meal.
The 2010 February Daring Bakers challenge was hosted by Michele of Veggie Num Nums. Michele chose to challenge everyone to make mezze based on various recipes from Claudia Roden, Jeffrey Alford and Naomi Dugid. You can download a PDF with the challenge details and other helpful information here. Michele really did her research and provided lots of optional recipes in addition to the required homemade pita and hummus. Thanks so much for your hard work, Michele!
This challenge was nice as you could do the minimum or get really creative and it could be done in advance for leisurely entertaining. Of course, I didn't plan correctly and there was nothing leisurely about my experience. I started at 4 p.m. Saturday before last and didn't finish until 8:30 p.m. I mean why would I want to spread the work out over several days when I could exhaust myself cramming it into one action packed night? :) Thank goodness Jeff allowed me to change plans and came to me. I'm not sure what I would have done with all the food without him. 16 pitas for one girl?! Even with his help, I was able to take leftovers to a Superbowl party Sunday, eat them all week and STILL have 3 pitas left as of tonight (2/13).
My pitas were mostly pocket-less. Those with pockets were significantly lighter and more enjoyable, even though the others still tasted good. I'm not sure why so few puffed. I used the same methodology throughout but it must be some technicality. I will definitely try pitas again with a quarter or half of the recipe. I have a feeling getting the pitas to puff takes practice. Do any other Daring Cooks have tips? If so, please share them!
As for the hummus, it was a bit raw for my taste between all the lemon juice and the garlic's bite. The hummus also needed more extra liquid than in past recipes. I love making my own hummus but I'll probably stick to the basic recipe I have scrawled in a notebook somewhere in my room or this AMAZING cilantro-lime hummus.
The provided Cucumber Raita recipe was enjoyable; I always had wondered what went into it. I'm certain I'll revisit it perhaps amping up the cumin since I love it so much. Cumin is about to be my first non-baking related spice to have ever used up, which seems like a milestone in the kitchen.
I also served cubed feta, a simple salad with roasted beets and a pearl barley salad loosely inspired by this complicated and wonderful Eggplant Barley Salad. The roasted beets were very fresh and bright with the zest of one lemon, juice of half a lemon and fresh parsley; I thought of this simple recipe when I threw them together. For the pearl barley salad, totally trying to remember now as I was lazy and didn't outline promptly, I cooked the pearl barley and set it aside to cool. While it was cooling, I sauteed ground lamb in water, then set it aside to drain. Next I added onions, cumin and coriander to the same pan and sauteed until the onions were translucent. Finally I combined everything together with some freshly chopped parsley, quartered and seeded cherry tomatoes and, when I realized I omitted salt, some crumbled feta to compensate. It could use some work but it wasn't a bad variation and it took a LOT less time.
As for the three leftover pitas? They are so going in the freezer for the moment. Don't get me wrong. It was a great, tasty challenge but I have mezze fatigue. I'm certain I'll be back to them sooner rather than later though as they are fun to put together and make a healthy, portable meal.
Why I felt the need to put silverware in everything is beyond me since, hello, the joy of mezze is scooping up food with the pita and eating with your hands.
Thursday, January 14, 2010
Pork Satay with Peanut Sauce
The January 2010 DC challenge was hosted by Cuppy of Cuppylicious and she chose a delicious Thai-inspired recipe for Pork Satay from the book 1000 Recipes by Martha Day. Cuppy was a generous host, who allowed a lot of wiggle room to us Daring Cooks. The only required element for this challenge was marinating the chosen meat.
I used the faster (cheaper) marinade listed below, substituting lime juice for lemon as I had a lime handy, on pork butt. In keeping with all the advice I’ve heard pork butt, clearly an area that gets lots of exercise on the pig, was a cheap cut of meat ($2.99/lb at Whole Foods). It isn’t something I ever expected to cook but it turned out very tasty after nearly 24 hours of marinating and the broiling. The meat was extremely tender with a rich flavor spicy enough to leave my lips burning a touch. Though I’m not sure the tingling was the norm or if it was the result of my lips’ tenderness due to the cold.
The peanut sauce was really easy to make, especially since I used a 1-cup measuring cup and the microwave to make it happen. My low powered microwave, which won’t even pop popcorn really, took about 2.5 minutes of 30 second intervals followed by stirring to dissolve the peanut butter creating a creamy sauce. I wasn’t sure I would like the peanut sauce but I did. Peanut butter as one would expect from the name was the predominant flavor.
Satay Marinade
1/2 small onion, chopped
2 garlic cloves, crushed
1 T ginger root, chopped (optional) (2 cm cubed)
2 T lemon juice (1 oz or 30 mls)
1 T soy sauce (0.5 oz or 15 mls)
1 tsp ground coriander (5 mls)
1 tsp ground cumin (5 mls)
1/2 tsp ground turmeric (2-2.5 mls)
2 T vegetable oil (or peanut or olive oil) (30 mls)
1 pound of pork (loin or shoulder cuts) (16 oz or 450g)
Feeling the need to make it more Thai? Try adding a dragon chili, an extra tablespoon of ginger root, and 1 tablespoon (0.5 oz or 15 mls) of fish sauce. (I keep some premature (still green) dragon chili peppers in the freezer for just such an occasion.)
Directions:
1a. Cheater alert: If you have a food processor or blender, dump in everything except the pork and blend until smooth. Lacking a food processor, I prefer to chop my onions, garlic and ginger really fine then mix it all together in a medium to large bowl.
2a. Cut pork into 1 inch strips.
3a. Cover pork with marinade. You can place the pork into a bowl, cover/seal and chill, or place the whole lot of it into a ziplock bag, seal and chill.
Faster (cheaper!) marinade:
2 T vegetable oil (or peanut or olive oil) (1 oz or 30 mls) (I used canola oil)
2 T lemon juice (1 oz or 30 mls) (like I said I used a lime)
1 T soy sauce (0.5 oz or 15 mls)
1 tsp ginger powder (5 mls)
1 tsp garlic powder (5 mls)
1 tsp cayenne pepper (5 mls)
Directions:
1b. Mix well.
2b. Cut pork into 1 inch thick strips (2-2.5 cm thick), any length.
3b. Cover pork with marinade. You can place the pork into a bowl, cover/seal and chill, or place the whole lot of it into a ziplock bag, seal and chill.
4. If using wooden or bamboo skewers, soak your skewers in warm water for at least 20 minutes before preparing skewers.
5. Gently and slowly slide meat strips onto skewers. Discard leftover marinade.*
6. Broil or grill at 290°C/550° F (or pan fry on medium-high) for 8-10 minutes or until the edges just start to char. Flip and cook another 8-10 minutes.
* If you’re grilling or broiling, you could definitely brush once with extra marinade when you flip the skewers.
Peanut Sauce
3/4 cup coconut milk (6 oz or 180 mls)
4 Tbsp peanut butter (2 oz or 60 mls)
1 Tbsp lemon juice (0.5 oz or 15 ml) (I used lime again)
1 Tbsp soy sauce (0.5 oz or 15 mls)
1 tsp brown sugar (5 mls)
1/2 tsp ground cumin (2.5 mls)
1/2 tsp ground coriander (2.5 mls)
1-2 dried red chilies, chopped (keep the seeds for heat) (I used a little cayenne here too instead)
Directions:
1. Mix dry ingredients in a small bowl. Add soy sauce and lemon, mix well.
2. Over low heat, combine coconut milk, peanut butter and your soy-lemon-seasoning mix. Mix well, stir often.
3. All you’re doing is melting the peanut butter, so make your peanut sauce after you’ve made everything else in your meal, or make ahead of time and reheat.
I used the faster (cheaper) marinade listed below, substituting lime juice for lemon as I had a lime handy, on pork butt. In keeping with all the advice I’ve heard pork butt, clearly an area that gets lots of exercise on the pig, was a cheap cut of meat ($2.99/lb at Whole Foods). It isn’t something I ever expected to cook but it turned out very tasty after nearly 24 hours of marinating and the broiling. The meat was extremely tender with a rich flavor spicy enough to leave my lips burning a touch. Though I’m not sure the tingling was the norm or if it was the result of my lips’ tenderness due to the cold.
The peanut sauce was really easy to make, especially since I used a 1-cup measuring cup and the microwave to make it happen. My low powered microwave, which won’t even pop popcorn really, took about 2.5 minutes of 30 second intervals followed by stirring to dissolve the peanut butter creating a creamy sauce. I wasn’t sure I would like the peanut sauce but I did. Peanut butter as one would expect from the name was the predominant flavor.
I served myself the satay on a bed of coconut rice, which neatly used up the other half of the 15 oz. can of light coconut milk, surrounded by blanched broccoli. I didn’t feel like the satay itself needed the sauce since it already had so much flavor, but it was delicious on my blanched broccoli (even if it didn’t look so appetizing). The coconut rice is very coconut and sticky by the way. I've hung onto that recipe for years.
The most exciting aspect of this project and my chosen sides was that had I done it in one night I think I could have completed everything at the same time without any issues, excluding the meat’s marinating time. I’ll be revisiting this to test that theory and because it was delicious and economical. Pork Satay
1/2 small onion, chopped
2 garlic cloves, crushed
1 T ginger root, chopped (optional) (2 cm cubed)
2 T lemon juice (1 oz or 30 mls)
1 T soy sauce (0.5 oz or 15 mls)
1 tsp ground coriander (5 mls)
1 tsp ground cumin (5 mls)
1/2 tsp ground turmeric (2-2.5 mls)
2 T vegetable oil (or peanut or olive oil) (30 mls)
1 pound of pork (loin or shoulder cuts) (16 oz or 450g)
Feeling the need to make it more Thai? Try adding a dragon chili, an extra tablespoon of ginger root, and 1 tablespoon (0.5 oz or 15 mls) of fish sauce. (I keep some premature (still green) dragon chili peppers in the freezer for just such an occasion.)
Directions:
1a. Cheater alert: If you have a food processor or blender, dump in everything except the pork and blend until smooth. Lacking a food processor, I prefer to chop my onions, garlic and ginger really fine then mix it all together in a medium to large bowl.
2a. Cut pork into 1 inch strips.
3a. Cover pork with marinade. You can place the pork into a bowl, cover/seal and chill, or place the whole lot of it into a ziplock bag, seal and chill.
Faster (cheaper!) marinade:
2 T vegetable oil (or peanut or olive oil) (1 oz or 30 mls) (I used canola oil)
2 T lemon juice (1 oz or 30 mls) (like I said I used a lime)
1 T soy sauce (0.5 oz or 15 mls)
1 tsp ginger powder (5 mls)
1 tsp garlic powder (5 mls)
1 tsp cayenne pepper (5 mls)
Directions:
1b. Mix well.
2b. Cut pork into 1 inch thick strips (2-2.5 cm thick), any length.
3b. Cover pork with marinade. You can place the pork into a bowl, cover/seal and chill, or place the whole lot of it into a ziplock bag, seal and chill.
4. If using wooden or bamboo skewers, soak your skewers in warm water for at least 20 minutes before preparing skewers.
5. Gently and slowly slide meat strips onto skewers. Discard leftover marinade.*
6. Broil or grill at 290°C/550° F (or pan fry on medium-high) for 8-10 minutes or until the edges just start to char. Flip and cook another 8-10 minutes.
* If you’re grilling or broiling, you could definitely brush once with extra marinade when you flip the skewers.
Peanut Sauce
3/4 cup coconut milk (6 oz or 180 mls)
4 Tbsp peanut butter (2 oz or 60 mls)
1 Tbsp lemon juice (0.5 oz or 15 ml) (I used lime again)
1 Tbsp soy sauce (0.5 oz or 15 mls)
1 tsp brown sugar (5 mls)
1/2 tsp ground cumin (2.5 mls)
1/2 tsp ground coriander (2.5 mls)
1-2 dried red chilies, chopped (keep the seeds for heat) (I used a little cayenne here too instead)
Directions:
1. Mix dry ingredients in a small bowl. Add soy sauce and lemon, mix well.
2. Over low heat, combine coconut milk, peanut butter and your soy-lemon-seasoning mix. Mix well, stir often.
3. All you’re doing is melting the peanut butter, so make your peanut sauce after you’ve made everything else in your meal, or make ahead of time and reheat.
Sunday, December 13, 2009
Salmon en Croute
The 2009 Daring Cooks December challenge was hosted by Simone of Junglefrog Cooking. Simone chose Salmon en Croute (or alternative recipes for Beef Wellington or Vegetable en Croute) from Good Food Online. I'm glad she introduced me to this dish as Salmon en Croute is delicious, rich and relatively simple.
As usual it took me longer than the expected cooking time of 50 minutes to create thanks to pre-made puff pastry's unaccounted for thaw time and my relatively meticulous chopping of the red potatoes, bosc pears, carrots and onions I roasted to serve on the side. I'm pretty sure Rafe was ready to shoot me when we sat down to eat at 9:50 p.m. but I've also convinced myself that he, Vika and Demaris forgave me when they realized how tasty the creamy Salmon en Croute was.
I used watercress and spinach for the herb crepe and made the decorative cut outs by hand, which were pretty even if they didn't cover up the seam where the pastry shell joined together. Cooking salmon for 30 minutes made me skeptical, but it was very moist and flaky likely thanks to the puff pastry packet and herb crepe's protection.
Next time I make this, I will use smaller pieces of salmon and remember to reserve some of the herb mixture for a garnish because as you can see my salmon packets are oozing green goo (so not attractive). This would be a great dinner party dish accompanied by a fresh salad or something similar. Roasted vegetables went well but doing two things in the oven certainly didn't help with getting this to the table promptly.
As usual it took me longer than the expected cooking time of 50 minutes to create thanks to pre-made puff pastry's unaccounted for thaw time and my relatively meticulous chopping of the red potatoes, bosc pears, carrots and onions I roasted to serve on the side. I'm pretty sure Rafe was ready to shoot me when we sat down to eat at 9:50 p.m. but I've also convinced myself that he, Vika and Demaris forgave me when they realized how tasty the creamy Salmon en Croute was.
I used watercress and spinach for the herb crepe and made the decorative cut outs by hand, which were pretty even if they didn't cover up the seam where the pastry shell joined together. Cooking salmon for 30 minutes made me skeptical, but it was very moist and flaky likely thanks to the puff pastry packet and herb crepe's protection.
Next time I make this, I will use smaller pieces of salmon and remember to reserve some of the herb mixture for a garnish because as you can see my salmon packets are oozing green goo (so not attractive). This would be a great dinner party dish accompanied by a fresh salad or something similar. Roasted vegetables went well but doing two things in the oven certainly didn't help with getting this to the table promptly.
Wednesday, October 14, 2009
Vietnamese Chicken Pho a.k.a. "Pho Ga"
Last month immediately before Spain I took the plunge and signed up for The Daring Kitchen Challenges...Making Vietnamese Chicken Pho a.k.a. "Pho Ga" was my first project. The October 2009 Daring Cooks’ challenge was brought to us by Jaden of the blog Steamy Kitchen. The recipes are from her new cookbook, The Steamy Kitchen Cookbook.
For me Pho's golden broth is a soothing elixir that helps ward off colds, soothes hangovers and temporarily cures minor troubles like heartache. It brings back dozens of car rides to Pho So 1 in Jim's 3,000 GT during college. I always eat it with way too much S'richa, by accident, so my nose runs endlessly throughout the meal. Charming, I know.
Making Pho was exciting and intimidating, even if I didn't go with the made from scratch option. The biggest obstacle for me was finding star anise; I went to TEN grocery stores on Saturday and finally tracked it down at Eli's Vinegar Factory. After all that effort, I felt strongly that the Pho should taste like liquid gold. The end result was quite good and I think my ability to prepare it can only improve. My main complaints were the cloudiness of the pre-made stock and not having Thai Basil. These things should be fairly easy to remedy when I try this again and it is only a matter of time until I do that!
If you like Pho Ga definitely try this recipe. It's actually quite easy.
Vietnamese Chicken Pho
Recipe Source: Jaden of Steamy Kitchen
Preparation Time: 45 cooking time + 15 minutes to cook noodles based on package directions
Servings: Makes 4 servings
Ingredients:
For the Chicken Pho Broth:
2 tbsp. whole coriander seeds
4 whole cloves
2 whole star anise
2 quarts (2 liters/8 cups/64 fluid ounces) store-bought or homemade chicken stock
1 whole chicken breast (bone in or boneless)
½ onion
1 3-inch (7.5 cm) chunk of ginger, sliced and smashed with side of knife
1 to 2 tbsps. sugar
1 to 2 tbsps. fish sauce (A note on fish sauce – I prefer the Three Crabs brand. Choose a fish sauce light in color…it should look like brewed tea. Anything darker than that (looking like Coca Cola) is inferior quality.)
1 lb. (500 grams/16 ounces) dried rice noodles (about ¼ inch/6 mm wide)
Accompaniments:
2 cups (200 grams/7 ounces) bean sprouts, washed and tails pinched off
Fresh cilantro (coriander) tops (leaves and tender stems)
½ cup (50 grams/approx. 2 ounces) shaved red onions
½ lime, cut into 4 wedges
Sriracha chili sauce
Hoisin sauce
Sliced fresh chili peppers of your choice
Directions:
1.To make the Chicken Pho Broth: heat a frying pan over medium heat. Add the coriander seeds, cloves and star anise and toast until fragrant, about 3-4 minutes. Immediately spoon out the spices to avoid burning. Char ginger and onion.
2.In a large pot, add all the ingredients (including the toasted spices) and bring to a boil.
3.Reduce the heat to medium-low and let simmer for 20 minutes, skimming the surface frequently.
4.Use tongs to remove the chicken breasts and shred the meat with your fingers, discarding the bone if you have used bone-in breasts.
5.Taste the broth and add more fish sauce or sugar, if needed. Strain the broth and discard the solids.
6.Prepare the noodles as per directions on the package.
7.Ladle the broth into bowls. Then divide the shredded chicken breast and the soft noodles evenly into each bowl.
8.Have the accompaniments spread out on the table. Each person can customize their own bowl with these ingredients.

For me Pho's golden broth is a soothing elixir that helps ward off colds, soothes hangovers and temporarily cures minor troubles like heartache. It brings back dozens of car rides to Pho So 1 in Jim's 3,000 GT during college. I always eat it with way too much S'richa, by accident, so my nose runs endlessly throughout the meal. Charming, I know.
Making Pho was exciting and intimidating, even if I didn't go with the made from scratch option. The biggest obstacle for me was finding star anise; I went to TEN grocery stores on Saturday and finally tracked it down at Eli's Vinegar Factory. After all that effort, I felt strongly that the Pho should taste like liquid gold. The end result was quite good and I think my ability to prepare it can only improve. My main complaints were the cloudiness of the pre-made stock and not having Thai Basil. These things should be fairly easy to remedy when I try this again and it is only a matter of time until I do that!
If you like Pho Ga definitely try this recipe. It's actually quite easy.
Vietnamese Chicken Pho
Recipe Source: Jaden of Steamy Kitchen
Preparation Time: 45 cooking time + 15 minutes to cook noodles based on package directions
Servings: Makes 4 servings
Ingredients:
For the Chicken Pho Broth:
2 tbsp. whole coriander seeds
4 whole cloves
2 whole star anise
2 quarts (2 liters/8 cups/64 fluid ounces) store-bought or homemade chicken stock
1 whole chicken breast (bone in or boneless)
½ onion
1 3-inch (7.5 cm) chunk of ginger, sliced and smashed with side of knife
1 to 2 tbsps. sugar
1 to 2 tbsps. fish sauce (A note on fish sauce – I prefer the Three Crabs brand. Choose a fish sauce light in color…it should look like brewed tea. Anything darker than that (looking like Coca Cola) is inferior quality.)
1 lb. (500 grams/16 ounces) dried rice noodles (about ¼ inch/6 mm wide)
Accompaniments:
2 cups (200 grams/7 ounces) bean sprouts, washed and tails pinched off
Fresh cilantro (coriander) tops (leaves and tender stems)
½ cup (50 grams/approx. 2 ounces) shaved red onions
½ lime, cut into 4 wedges
Sriracha chili sauce
Hoisin sauce
Sliced fresh chili peppers of your choice
Directions:
1.To make the Chicken Pho Broth: heat a frying pan over medium heat. Add the coriander seeds, cloves and star anise and toast until fragrant, about 3-4 minutes. Immediately spoon out the spices to avoid burning. Char ginger and onion.
2.In a large pot, add all the ingredients (including the toasted spices) and bring to a boil.
3.Reduce the heat to medium-low and let simmer for 20 minutes, skimming the surface frequently.
4.Use tongs to remove the chicken breasts and shred the meat with your fingers, discarding the bone if you have used bone-in breasts.
5.Taste the broth and add more fish sauce or sugar, if needed. Strain the broth and discard the solids.
6.Prepare the noodles as per directions on the package.
7.Ladle the broth into bowls. Then divide the shredded chicken breast and the soft noodles evenly into each bowl.
8.Have the accompaniments spread out on the table. Each person can customize their own bowl with these ingredients.

Subscribe to:
Posts (Atom)